Students
The Students module manages a student's entire lifecycle: from pre-registration to exit, including their full record and class transfers. Accessible from Student Management → Students.
Video transcript
- In the menu, open Student Management, then Students.
- The list shows every active student: ID number, name, gender and class.
- To enroll a student, click New student.
- In the Personal tab, only the Last name is required.
- Add the first name, then pick the gender.
- Enter the date and place of birth. The other fields can be completed later.
- Switch to the Academic tab.
- Leave Auto on: the ID number is generated for you.
- Choose the Class: it is required.
- In Family / Emergency, add a parent and a phone number.
- Medical and Payments are optional: a first payment and a scholarship can be entered there.
- Click Save and wait a moment.
- The student is enrolled. Find them with the quick search: the ID number was generated.
- Expand the row to see the student's full record.
Student list
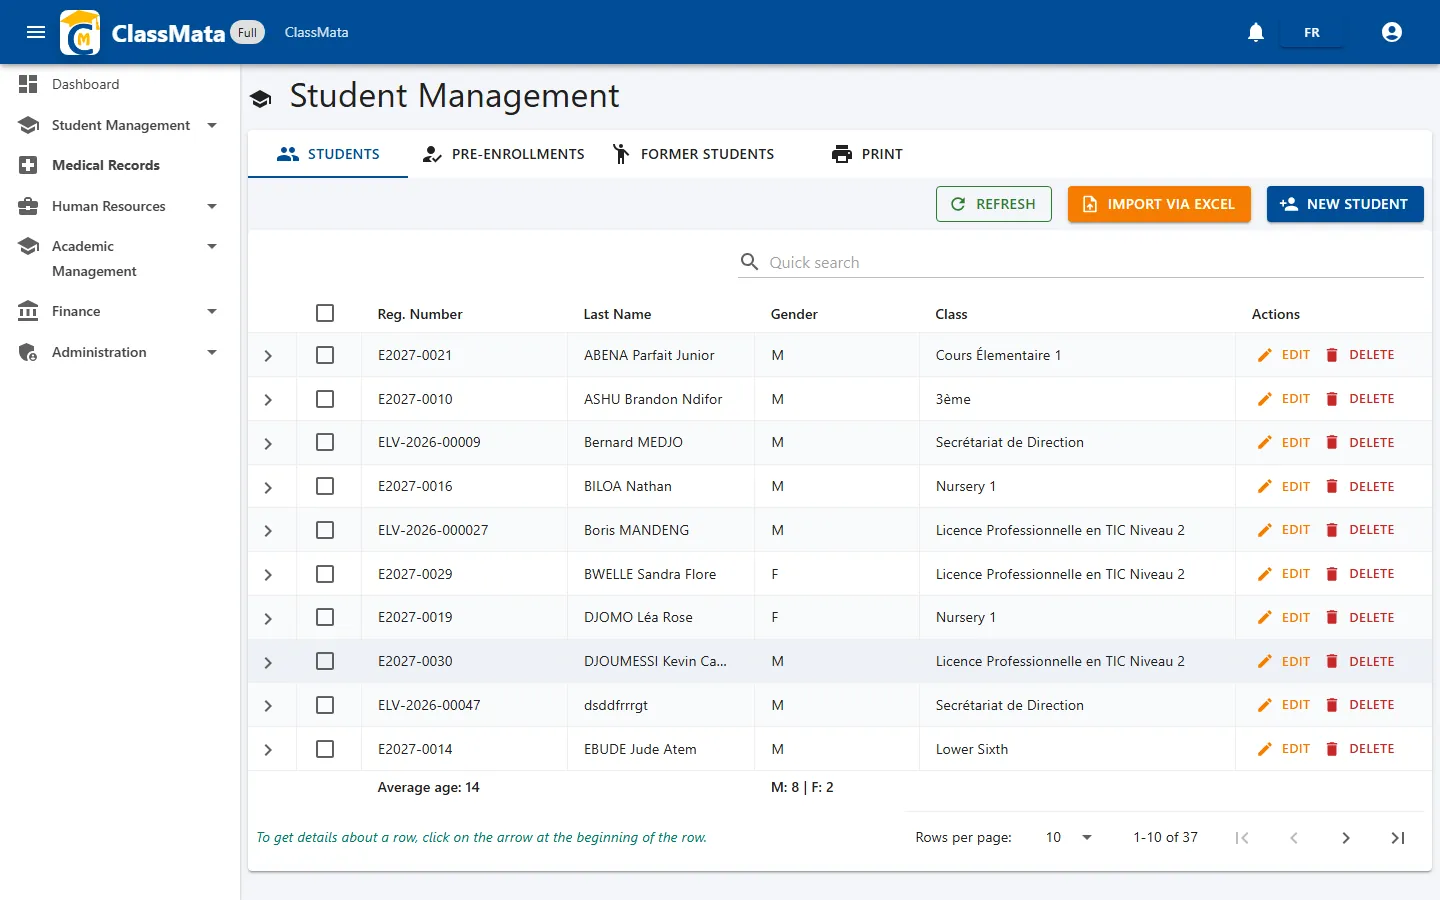
The table lists every active student with their ID number, Name, Gender and Class. The search bar filters instantly across these columns.
Three top-level actions are available:
- Refresh the list
- Import via Excel for bulk enrollment
- Create a New student one at a time
Each row offers Edit and Delete. The table footer shows the average age and M/F split for the current page.
Student record (detail)
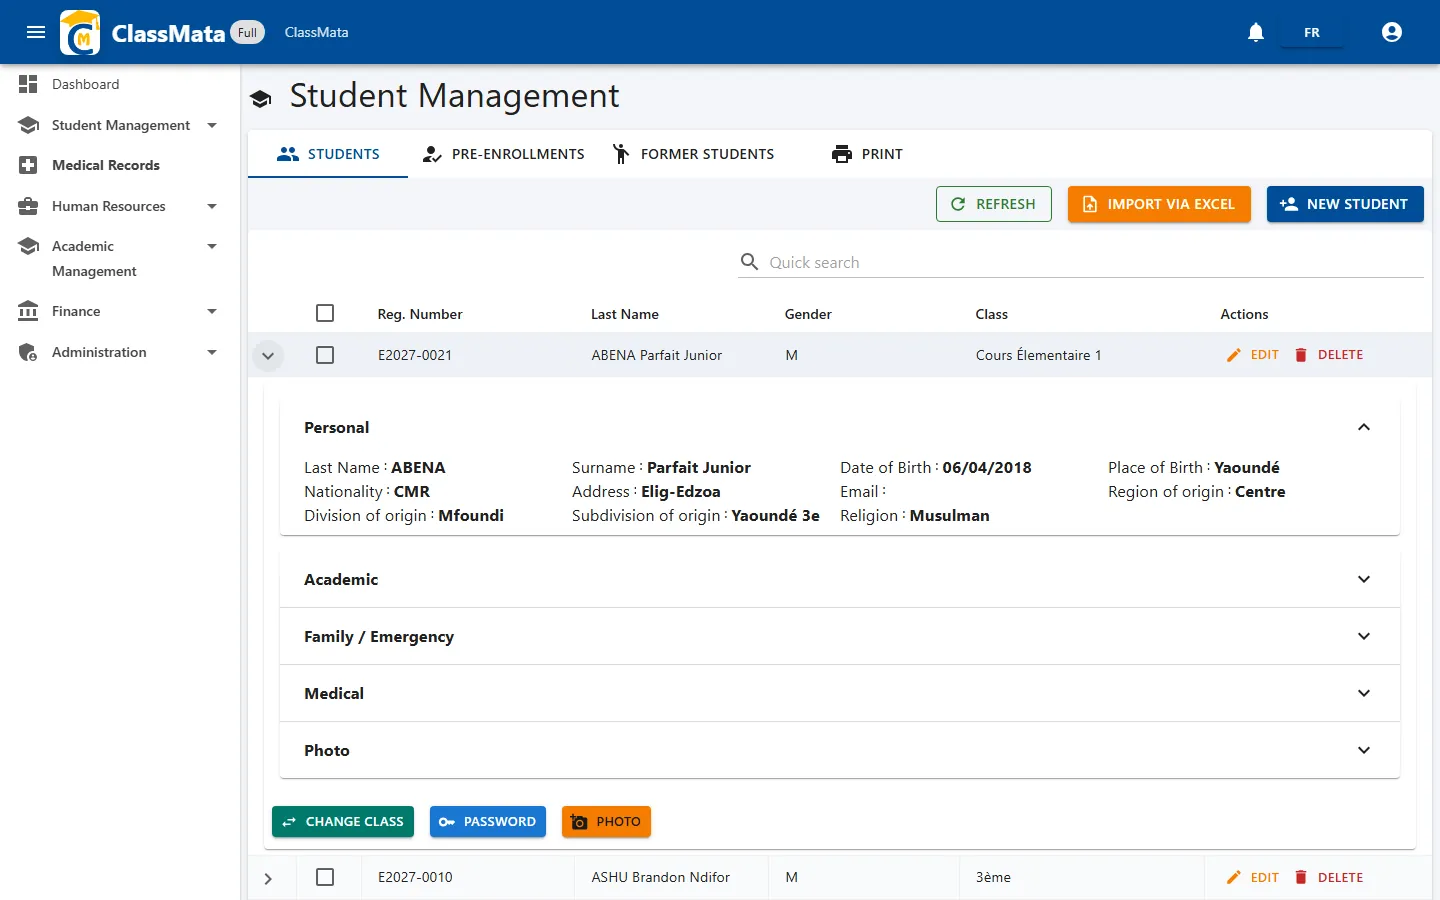
Clicking the arrow at the start of a row expands the full student record without leaving the list. It's made of five collapsible sections:
- Personal — civil status, birth, background, religion
- Academic
- Family / Emergency
- Medical
- Photo
Four quick actions sit at the bottom of the record, available to users allowed to edit students:
- Change class — transfers the student to another class
- Password — e-mails a temporary password to the student (see below)
- Reset — generates a temporary password shown on screen
- Photo — adds or replaces the student's portrait (see below)
Creating a new student
The New student button opens a five-tab form, one per information category.
Personal
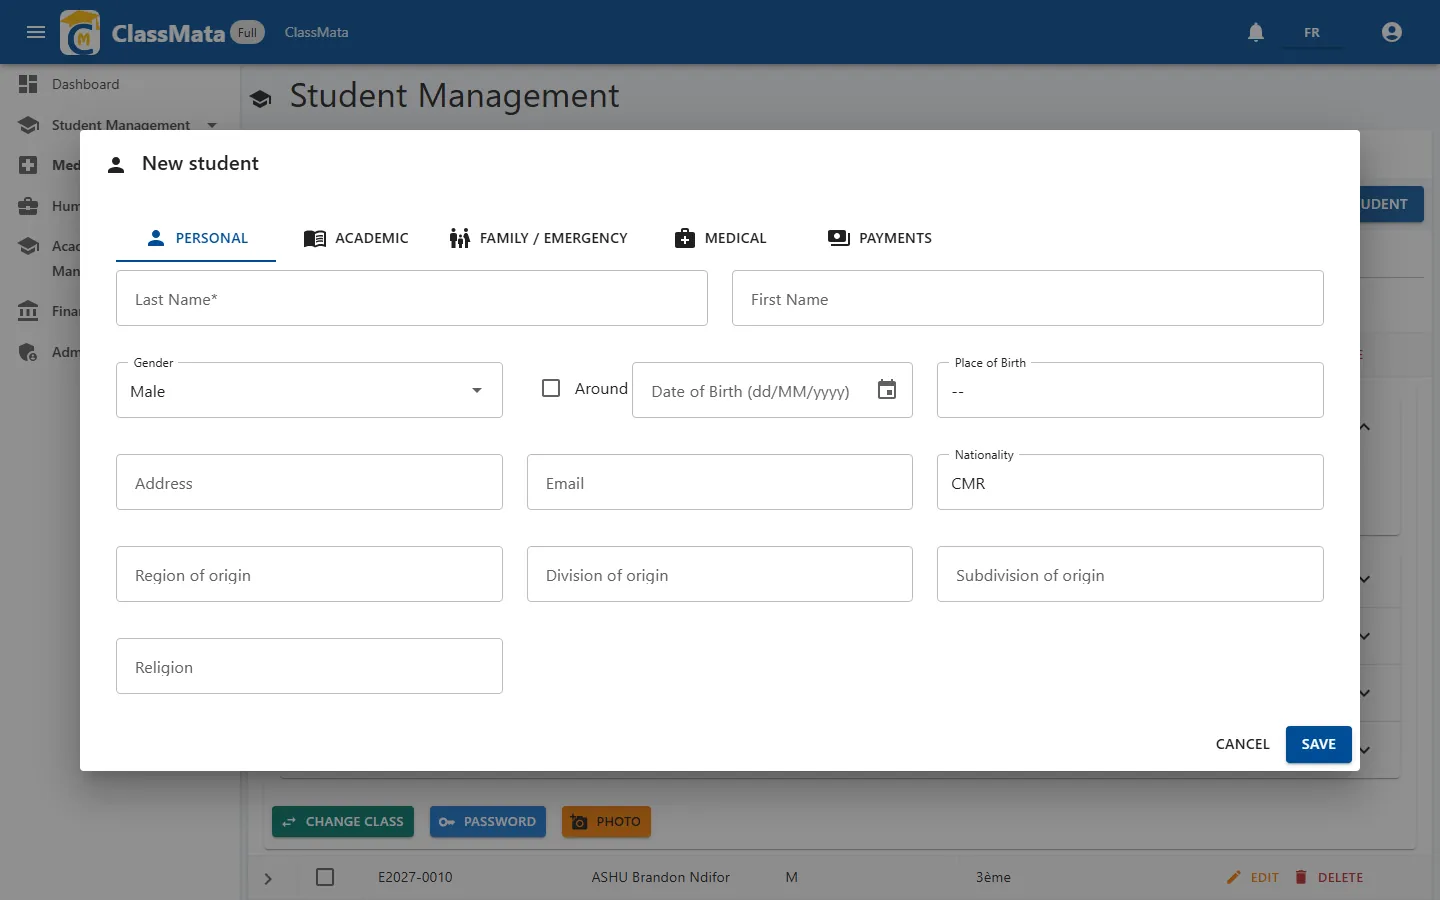
Captures the student's last name, first name, gender, date and place of birth, address, email, nationality and geographic background. Only Last name is strictly required to move forward — other fields can be filled in later from the detail record.
Academic
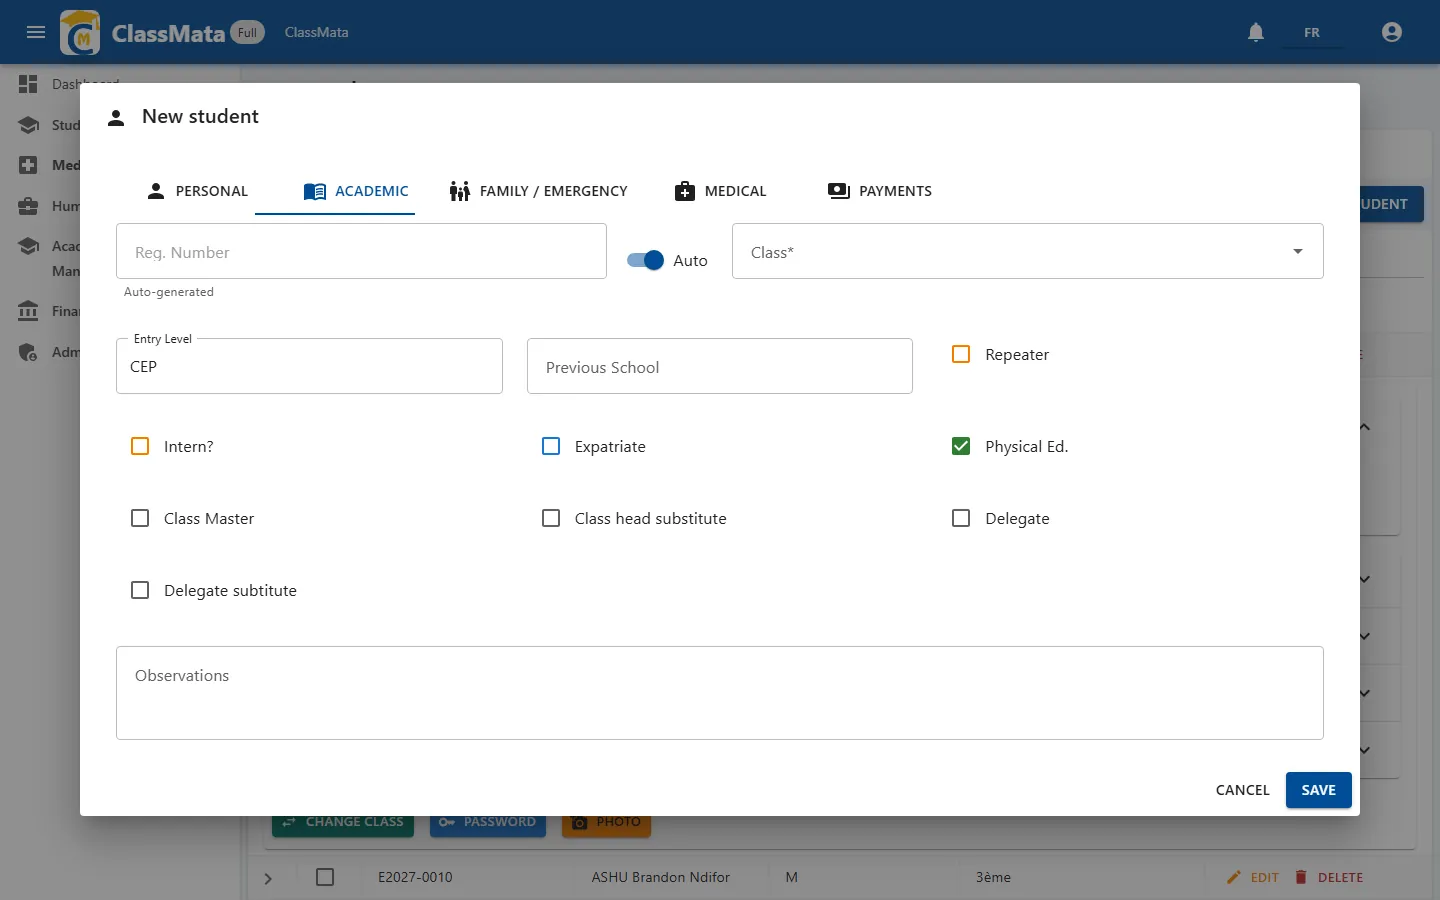
Attaches the student to a class and sets their academic status. The ID number can be auto-generated (Auto toggle) or entered manually; the Class is required. The Repeating, Boarder, Expatriate and PE checkboxes qualify the academic profile. The Class president, Vice president, Delegate and Deputy delegate roles are checked directly here.
Family / Emergency
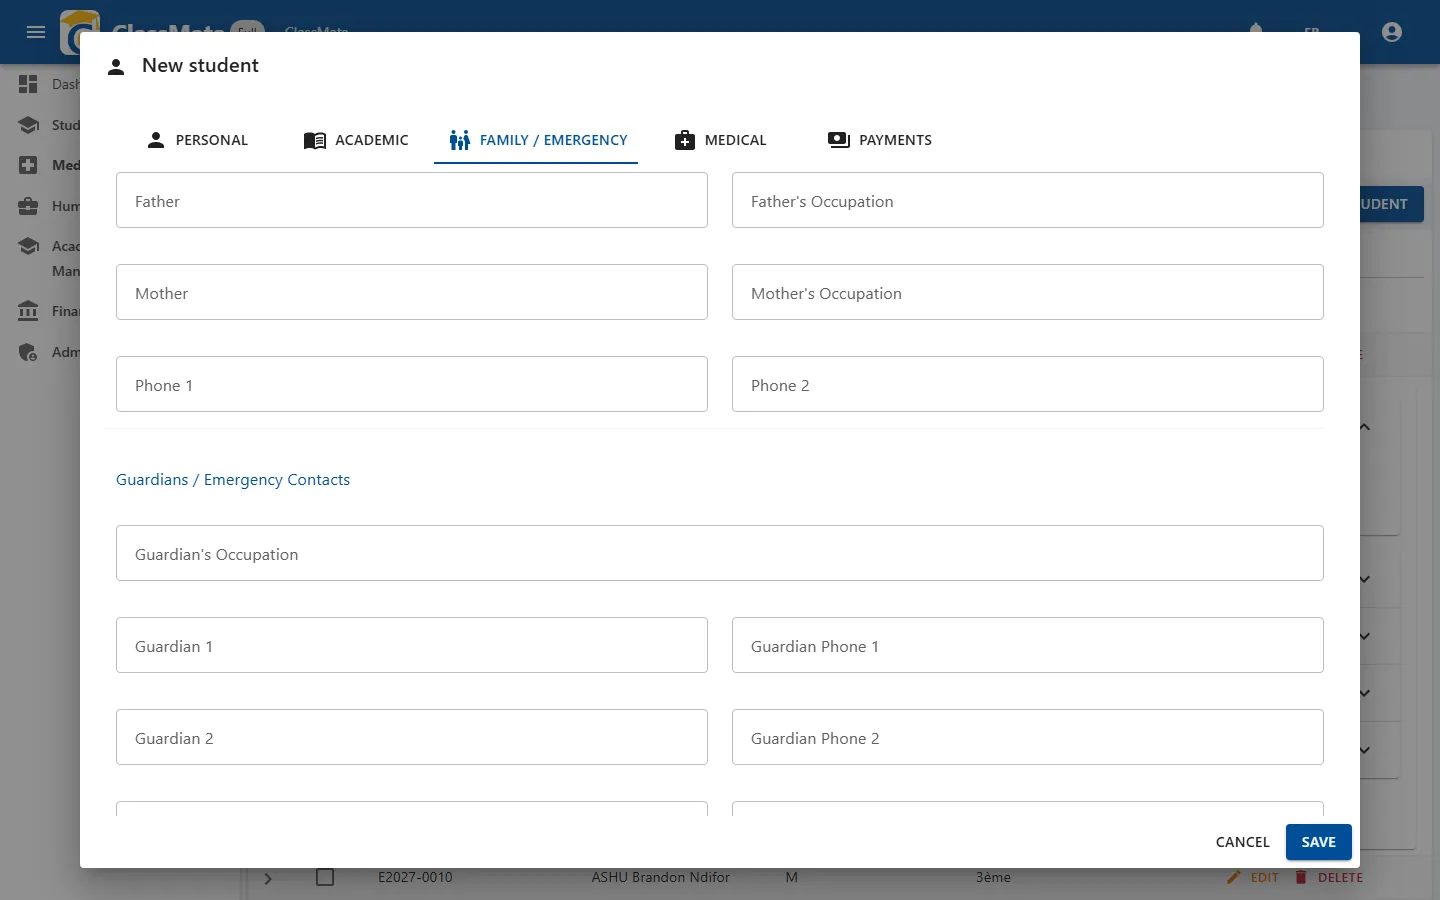
Parent contact details (occupations, two phone numbers). The Guardians / Emergency contacts section allows declaring up to two additional guardians — useful for boarding students or shared custody.
Medical
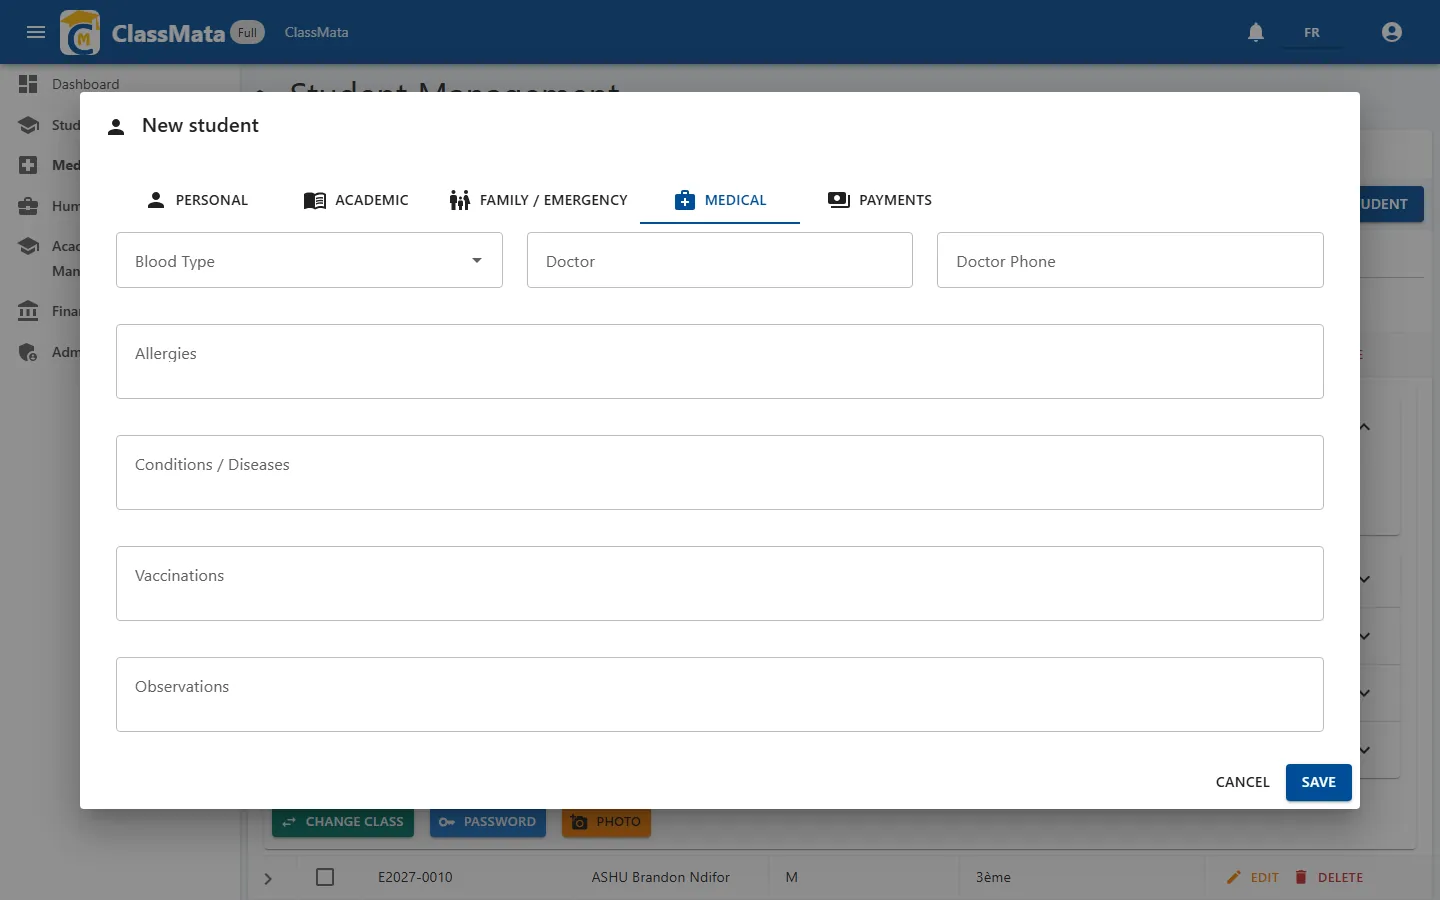
A minimal health record for emergencies: blood type, treating physician and their phone number, allergies, conditions, vaccinations and free-text notes. This information also surfaces in the Medical Records module in the sidebar.
Payments
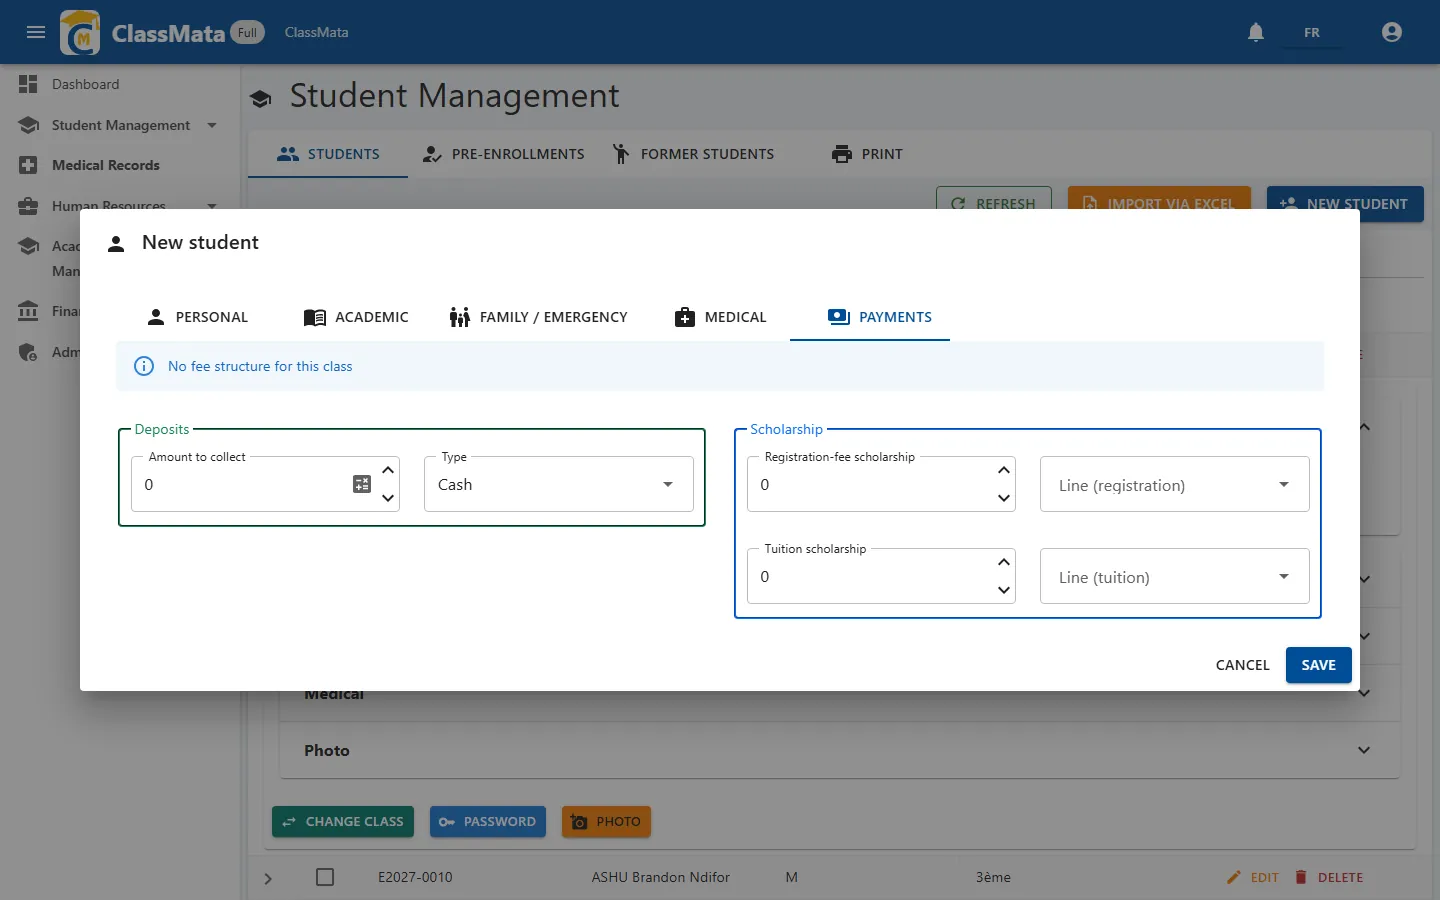
Collects the first payment and applies a scholarship right at creation time. The Payments column collects an initial amount (cash, cheque…). The Scholarship column applies a flat or percentage discount on registration fees and/or tuition. A warning appears if no fee structure has been configured yet for the selected class.
Editing a student
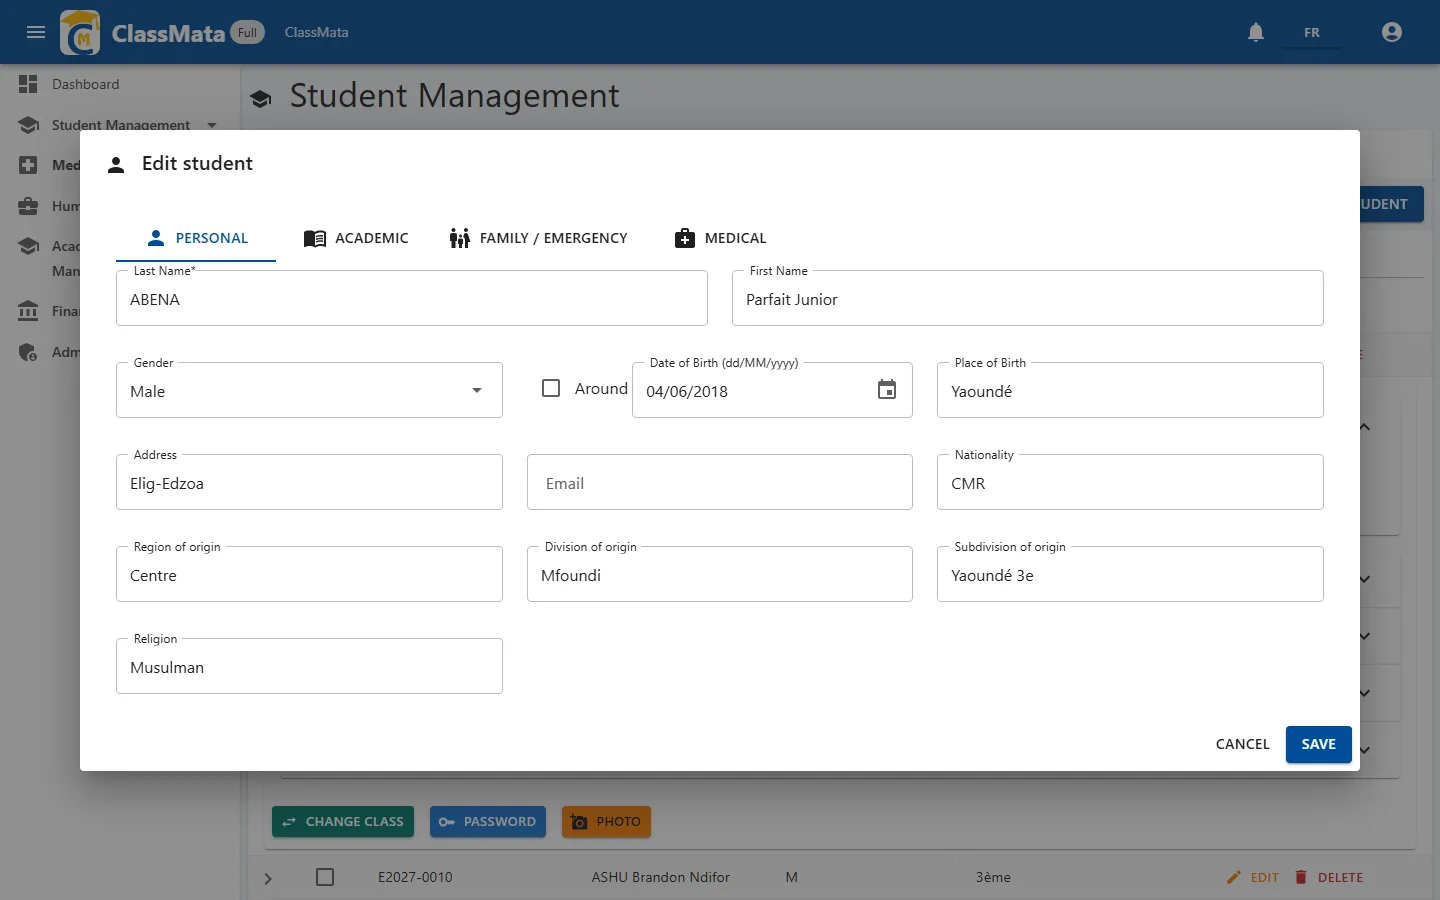
The Edit button on a row reopens the same form, pre-filled. Same structure as the creation form (Personal / Academic / Family / Medical tabs), except the Payments tab, which only appears at creation time. Any change is confirmed with Save or discarded with Cancel.
Import via Excel
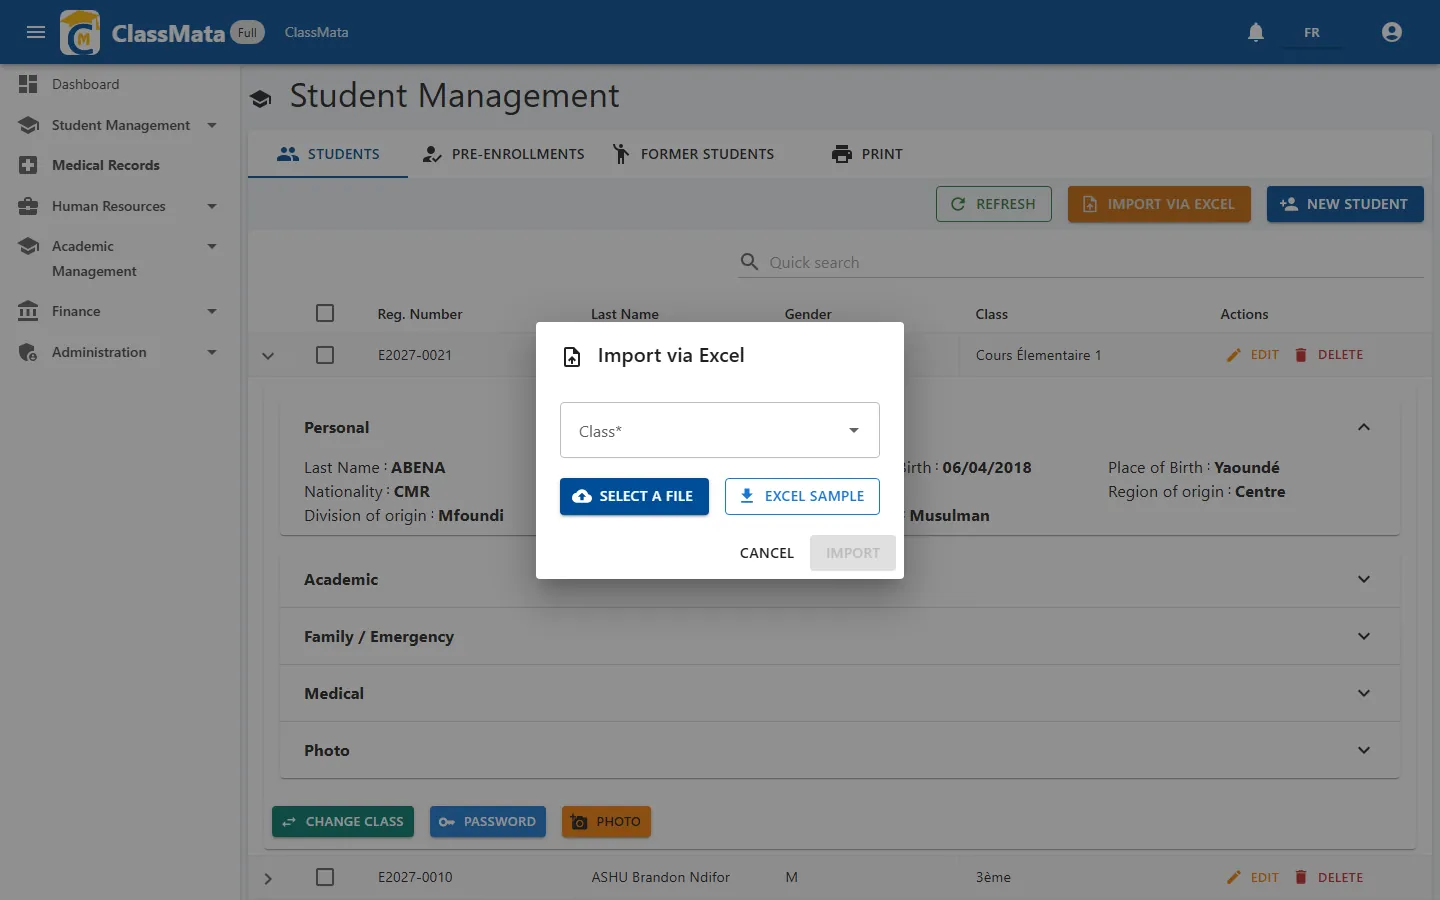
Enrolls an entire class in one operation instead of record by record. First pick the target Class, then download the Excel template if you need a blank one to fill offline. Once the file is filled in, Select a file loads it; the Import button only activates once a valid class and file are chosen.
Pre-registrations
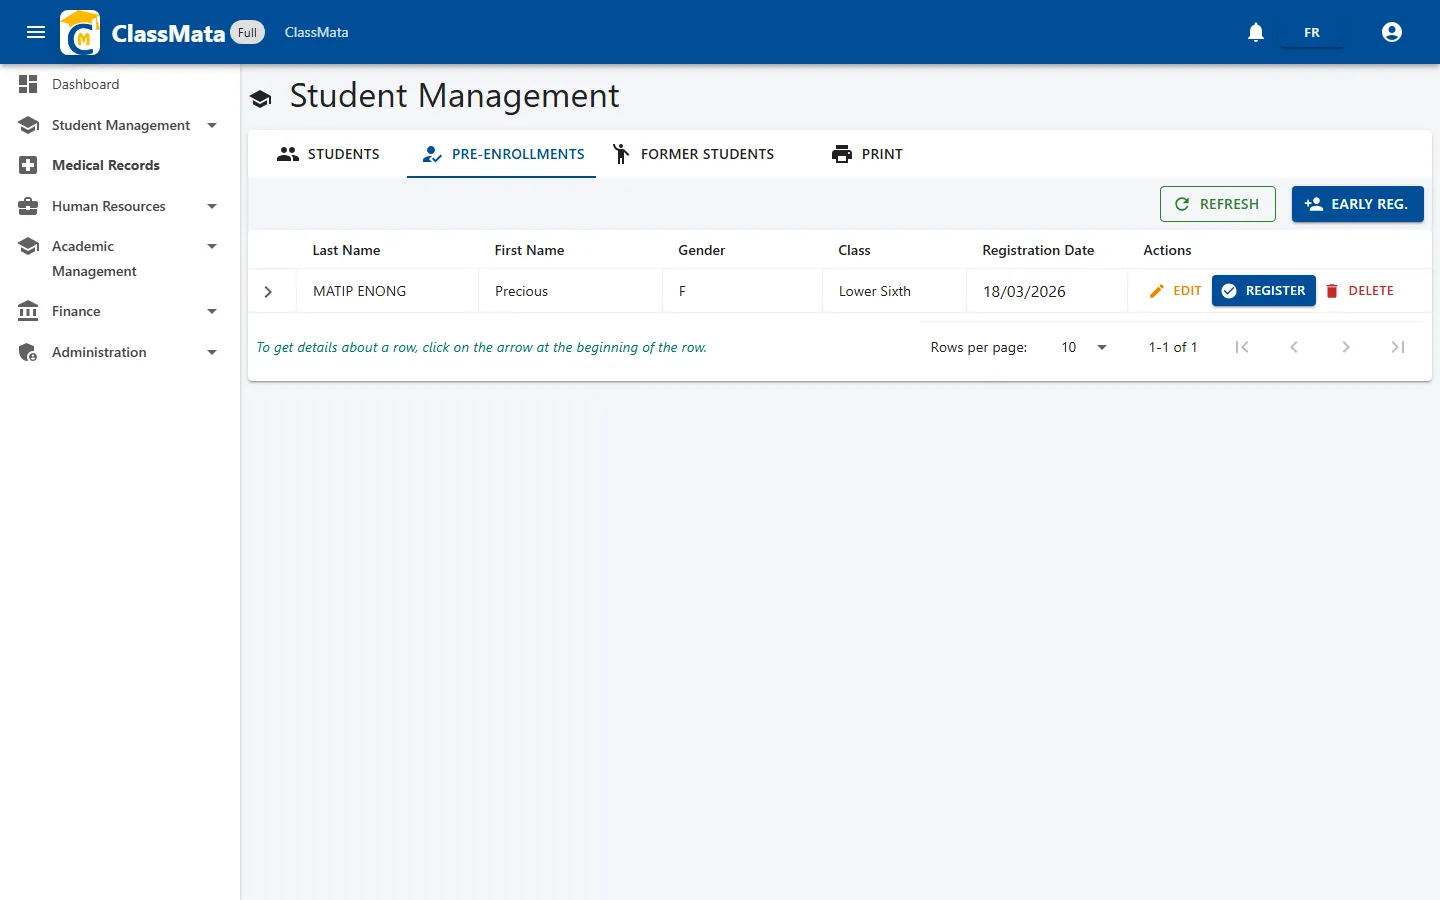
A waiting queue of candidates not yet full students. Each application shows last name, first name, gender, target class and application date. The Enroll button converts a pre-registration into an active student (it then moves into the main list); Edit and Delete remain available while the application is pending.
Former students
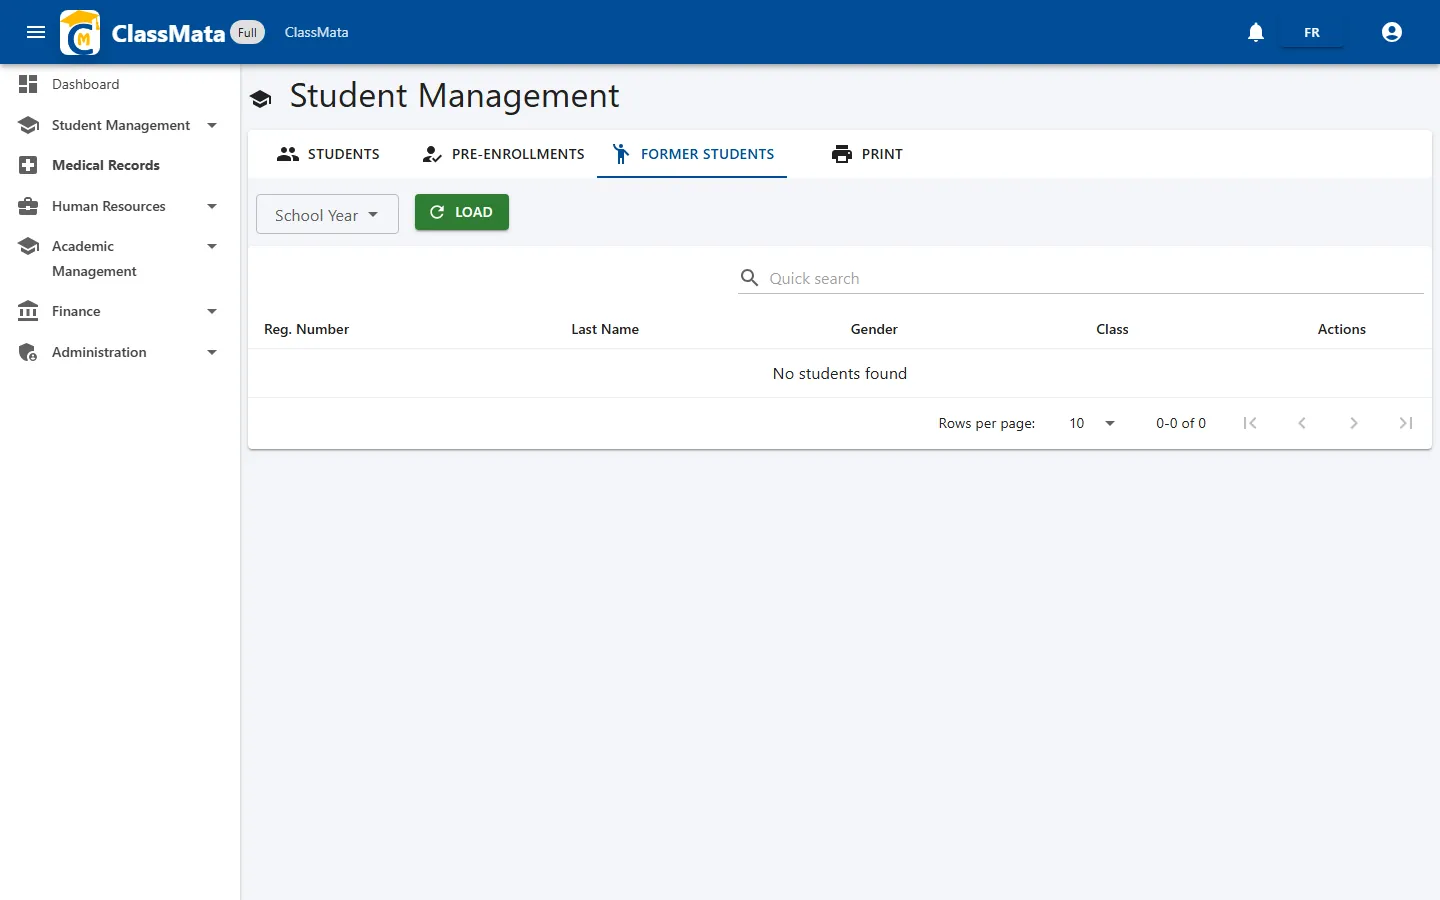
A browsable archive of students who left, organized by school year. Pick a School year and click Load to show students who left the school that year (transfer, graduation, expulsion…).
Printing
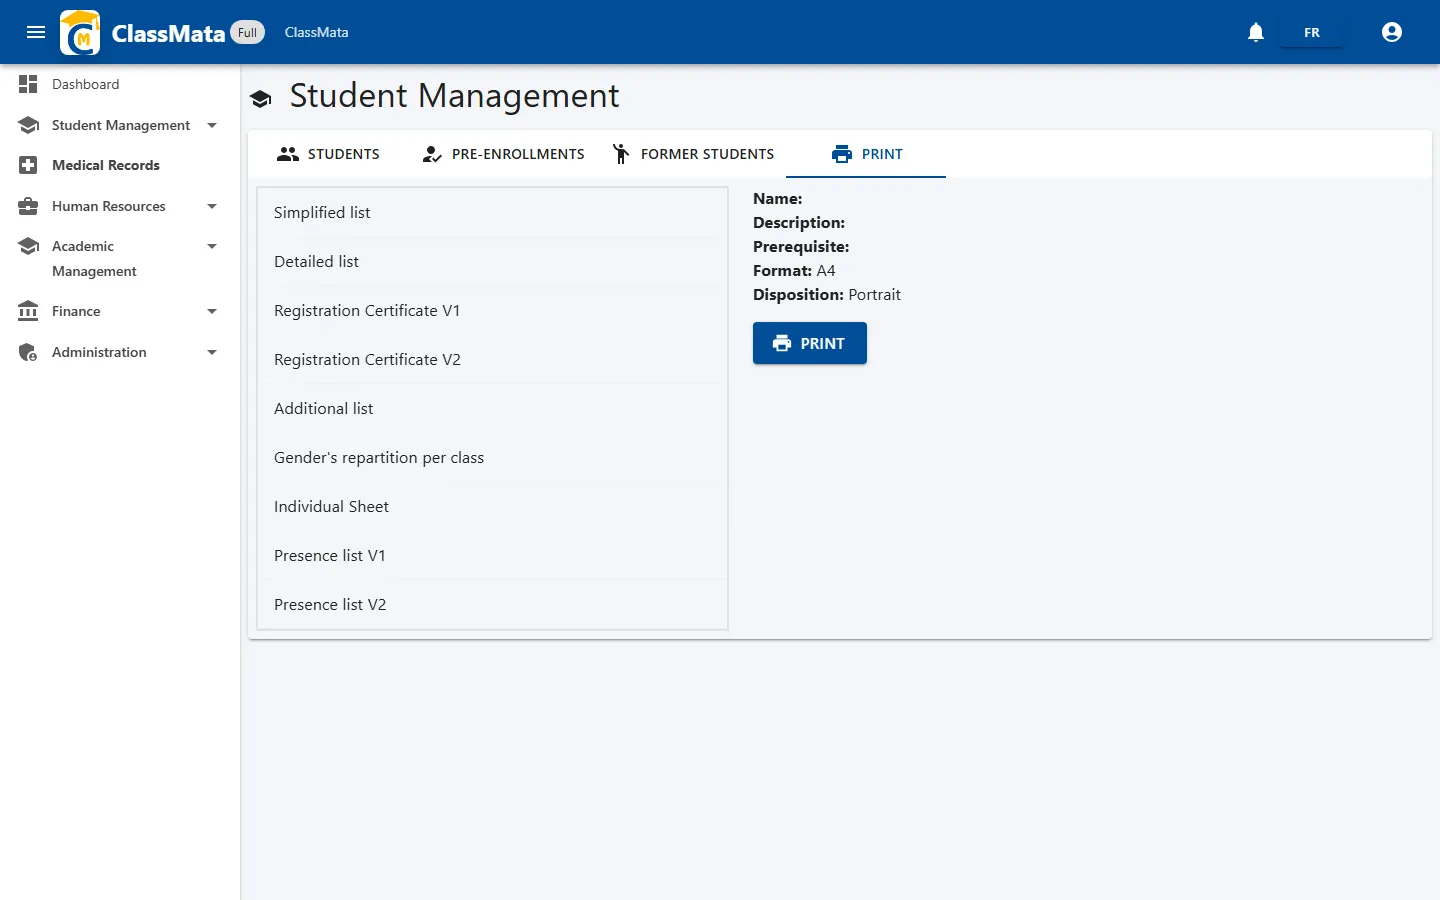
A library of printable documents generated from student data. Nine templates are available: simple/detailed lists, two versions of the Certificate of Enrollment, waiting list, gender statistics by class, individual record sheet, and two versions of the attendance list. Selecting a template shows its metadata (description, prerequisites, format, layout) before clicking Print.
Add a photo to a student
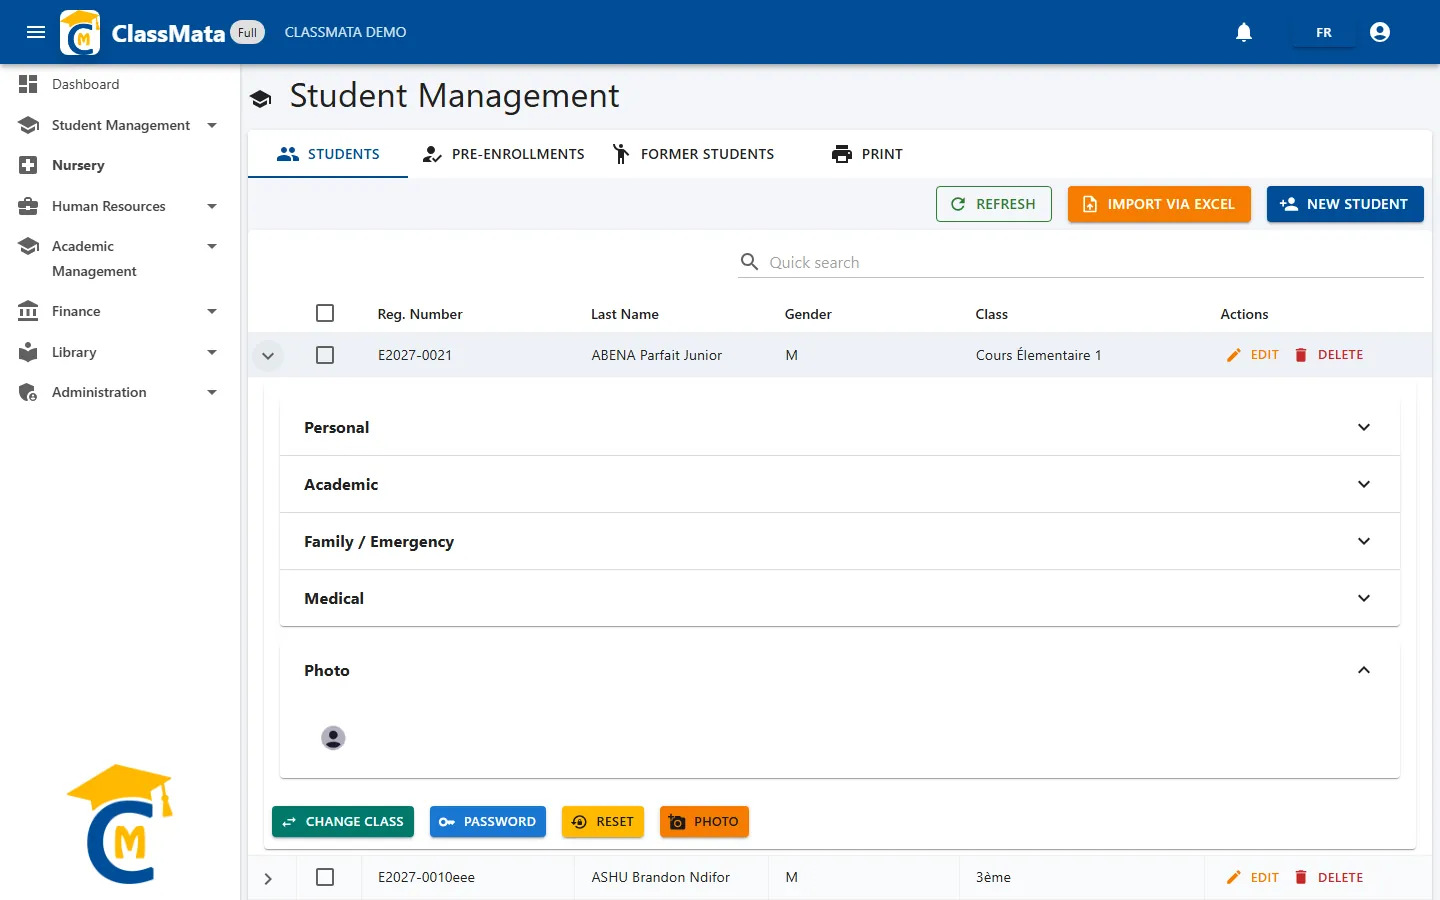
A student's portrait is added from their detail record:
- In the list, click the arrow at the start of the row to expand the student's record.
- Expand the Photo section. Until a portrait is saved, a grey silhouette is shown instead.
- Click the orange Photo button at the bottom of the record, then pick the image on your computer.
Saving is immediate, with no confirmation button: a green Photo saved successfully. message confirms it.
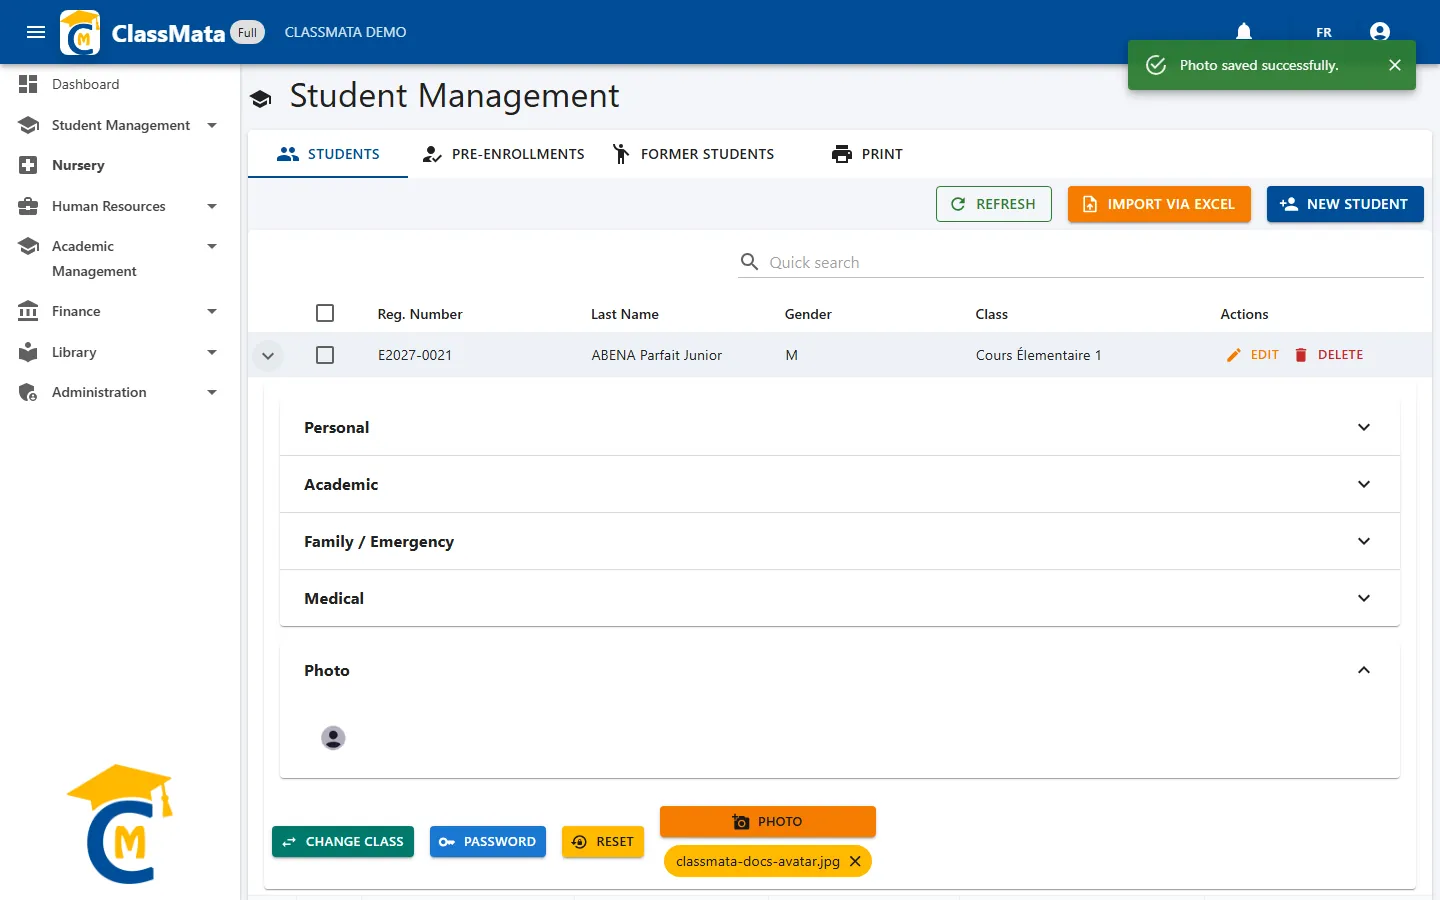
Accepted format. Only JPEG images (
.jpg/.jpeg) of 100 KB or less are accepted. A file in another format, or one that is too large, is rejected with a warning message and nothing is saved. Crop and compress the photo beforehand if needed.
The Photo section preview refreshes when it opens: collapse and expand the section (or reopen the record) to see the new portrait.
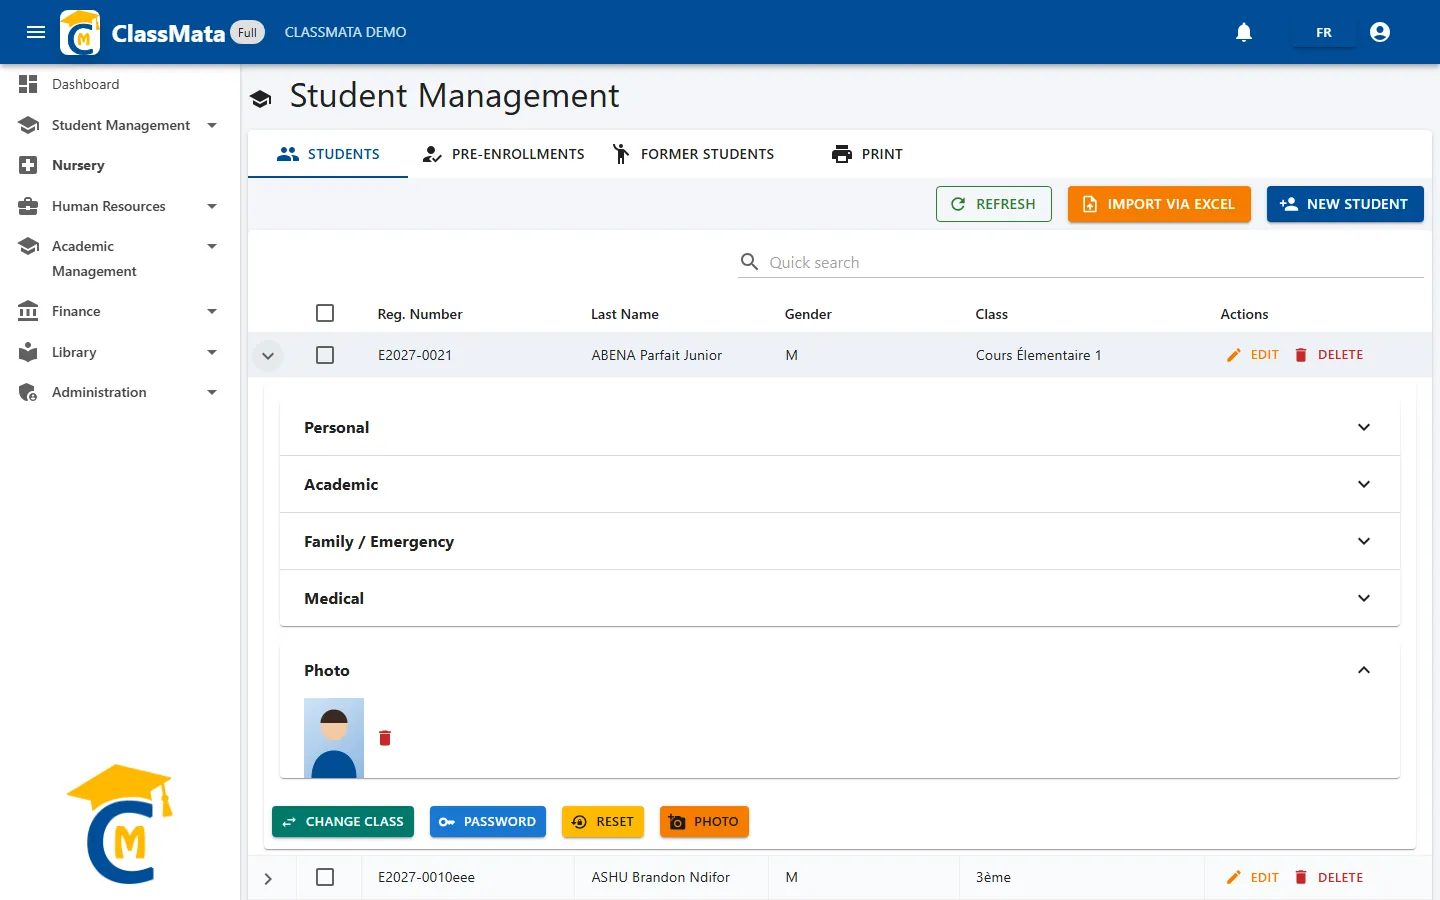
Delete or replace a photo
Once a portrait is saved, a red trash icon appears next to the image. It asks for confirmation before permanently deleting the photo.
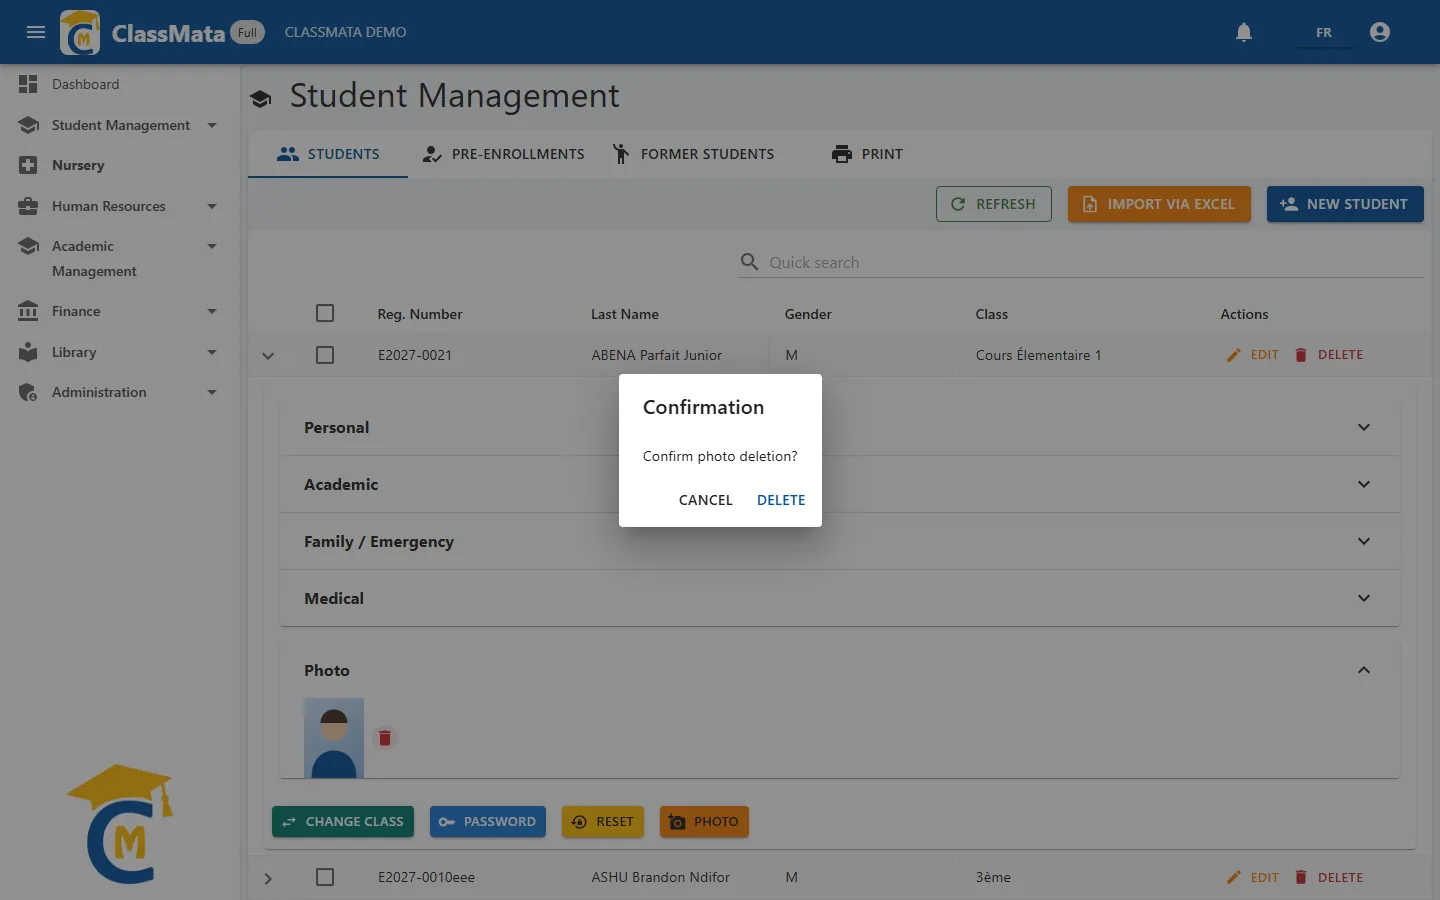
To replace a portrait, simply use the Photo button again with a new image: it takes the old one's place.
Reset a student's password
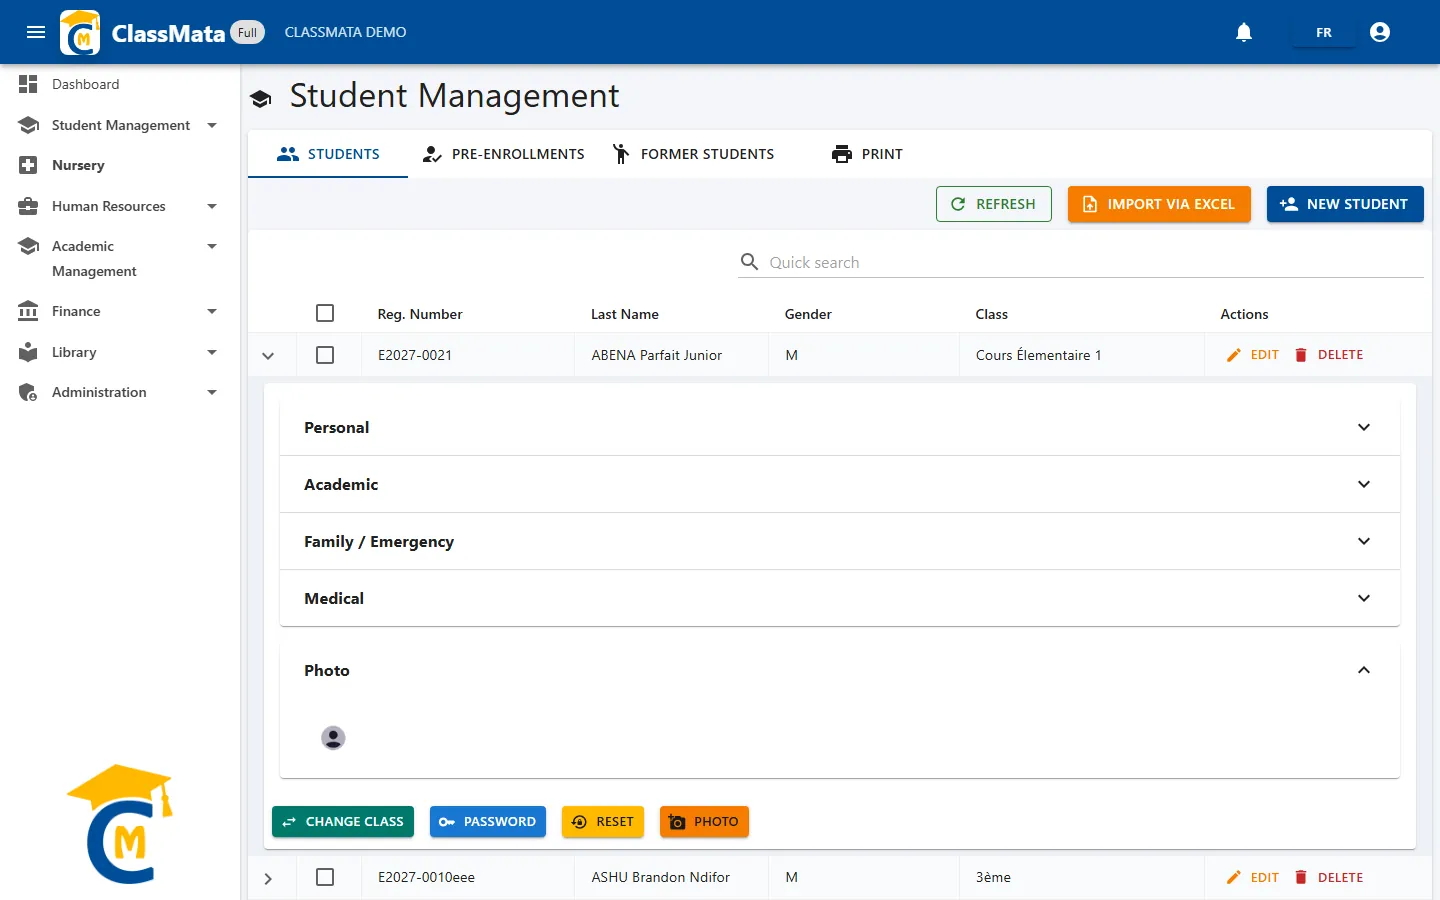
Two buttons on the student record let you give access back to a student who has lost their password. In both cases ClassMata generates a 12-character temporary password (upper-case, lower-case and digits) that the student must change at their next login.
| Button | What it does | Use it when |
|---|---|---|
| Password | Sends the temporary password by e-mail to the student's address | The student has an e-mail address on file and the school's mail server is configured |
| Reset | Shows the temporary password on screen | The student has no e-mail, or you prefer to hand it over in person |
Reset and display the password
Expand the student's record and click Reset.
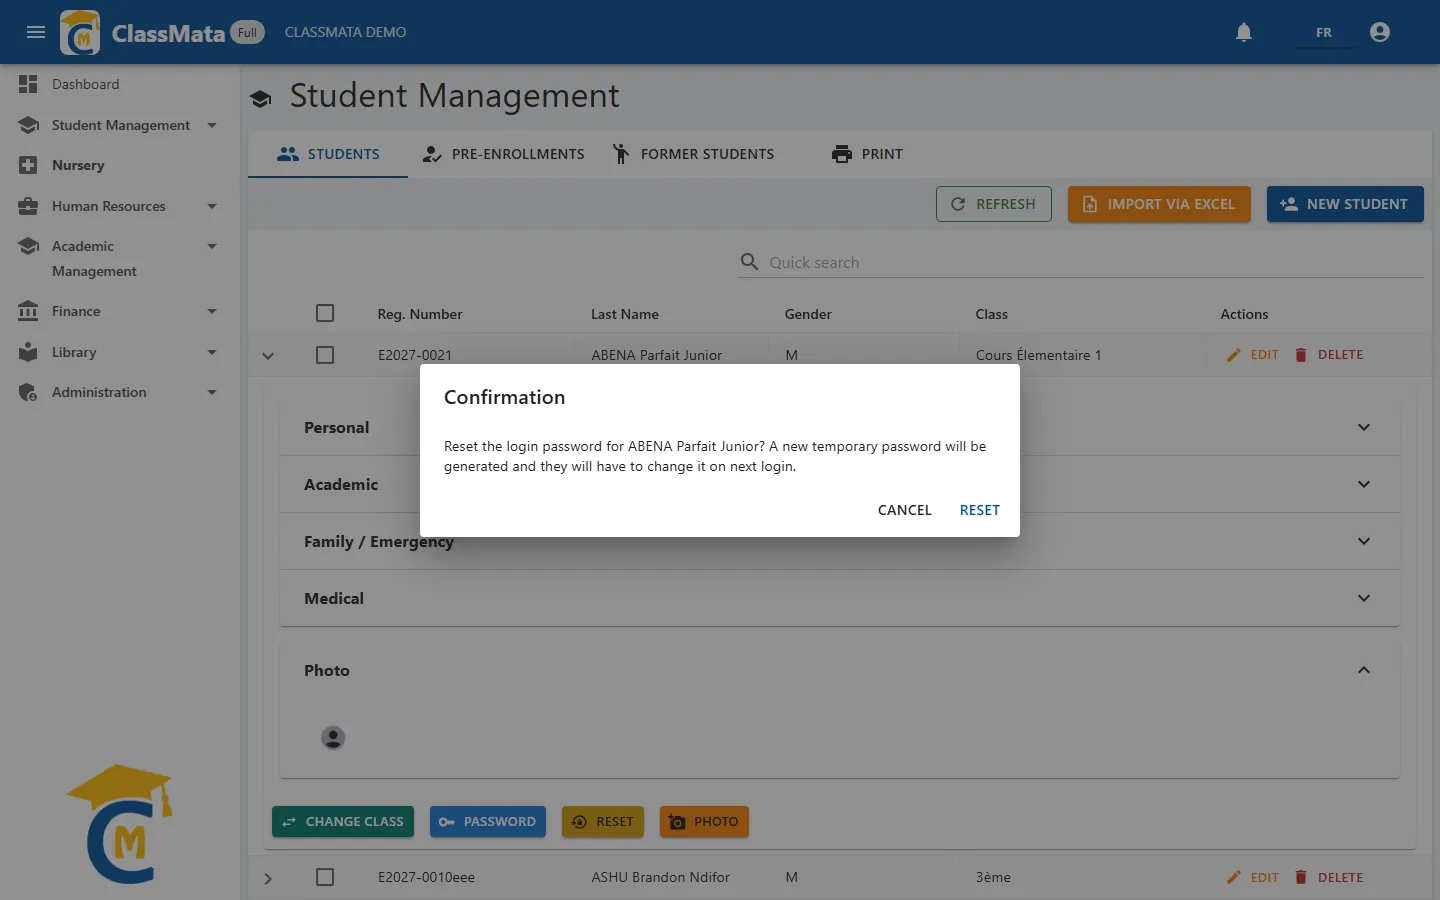
A confirmation window reminds you that a new temporary password will be generated. Click Reset to confirm, or Cancel to back out.
The new temporary password is shown in a window.
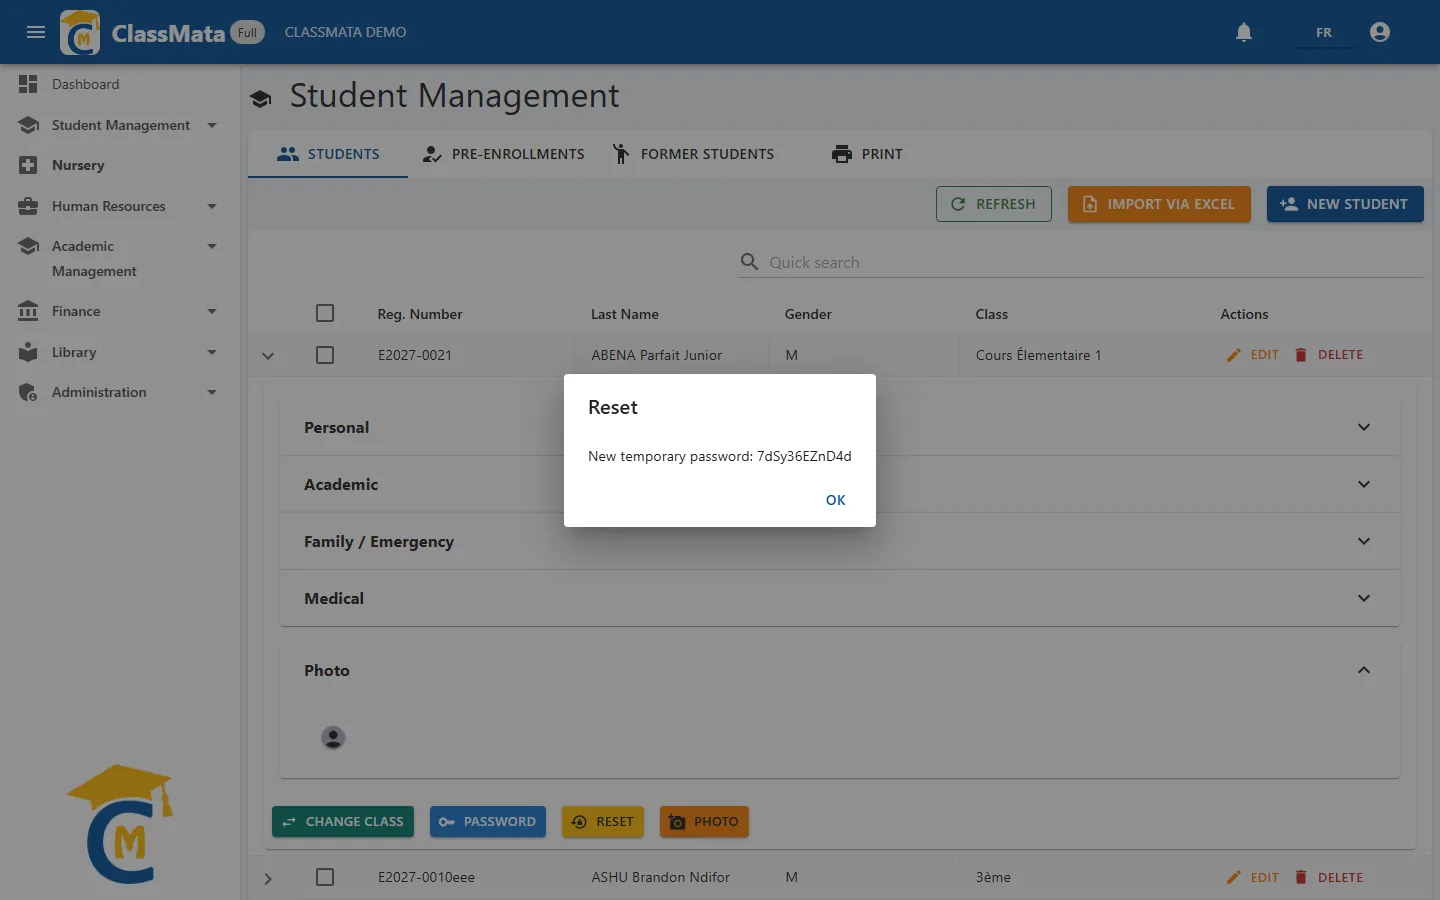
Write it down before closing the window. The password is shown only once and cannot be looked up afterwards. If you lose it, run the reset again.
Send the password by e-mail
The Password button also generates a temporary password, but sends it straight to the student's e-mail address; a Password sent to … message confirms it. If the record has no address, the No e-mail address defined for this student. message appears: fill in the e-mail in the edit form first, or use Reset instead.
Last updated: