Step by step: build the timetable without conflicts
This guide takes you from an empty school to a printed, conflict-free timetable for one class. It chains four pages of ClassMata in the right order: periods, shifts, subject assignments, then the timetable designer. Each step links to the page that documents it in detail.
What you need. The right to manage periods and timetables, and a class that already exists (see Classes).
Step 1: Create the periods
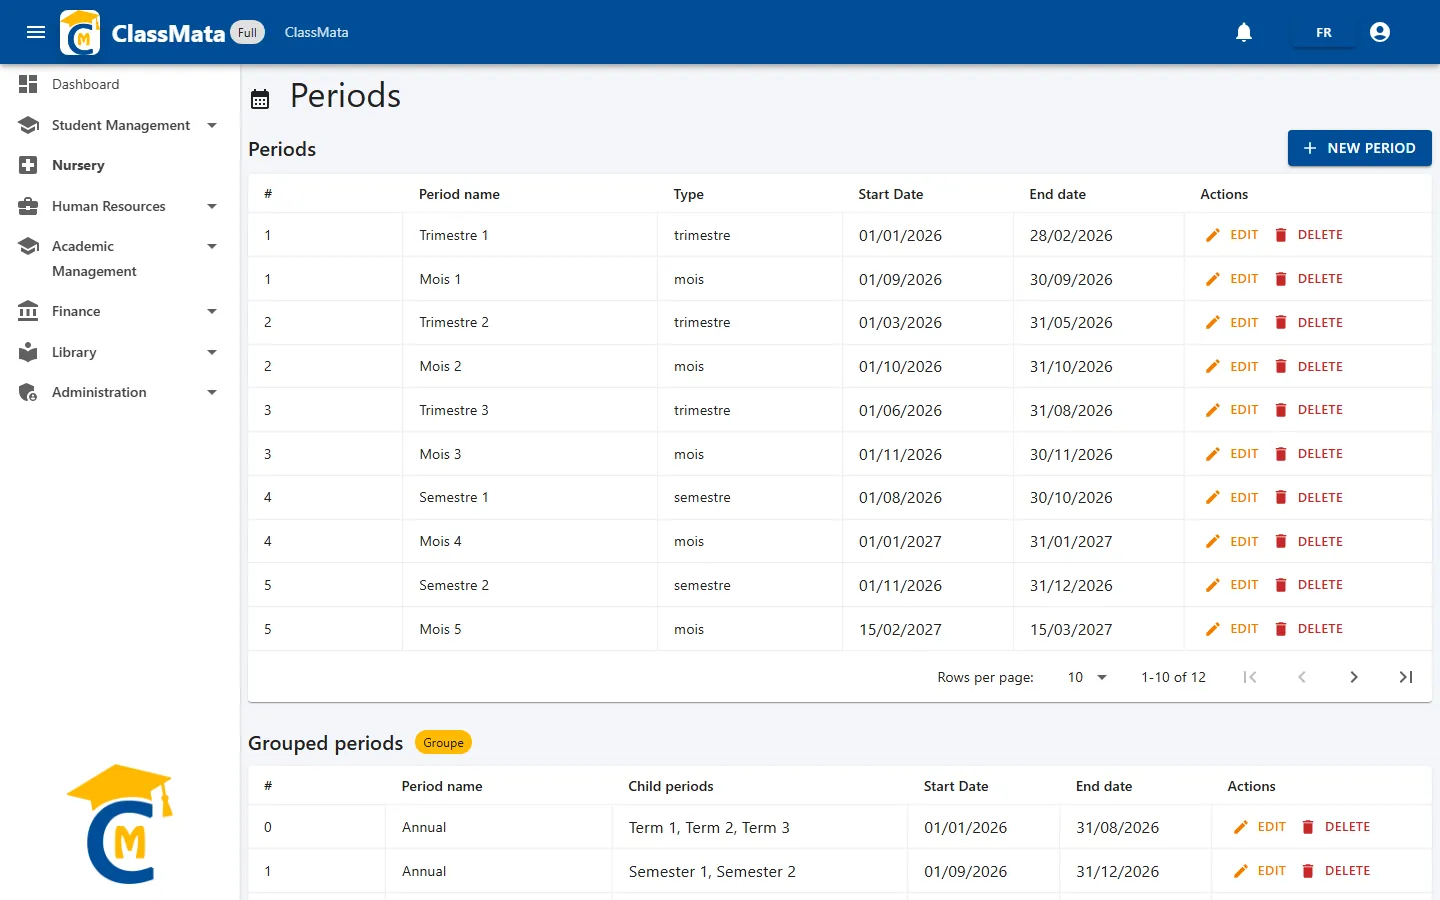
Open Academic Management → Periods and make sure the school year's terms exist, with correct Start Date and End date. A period's dates decide which weeks of the timetable can be edited: cells outside the dates are locked. Do not let periods of the same type overlap. Details: Periods.
Step 2: Define the shifts (time slots)
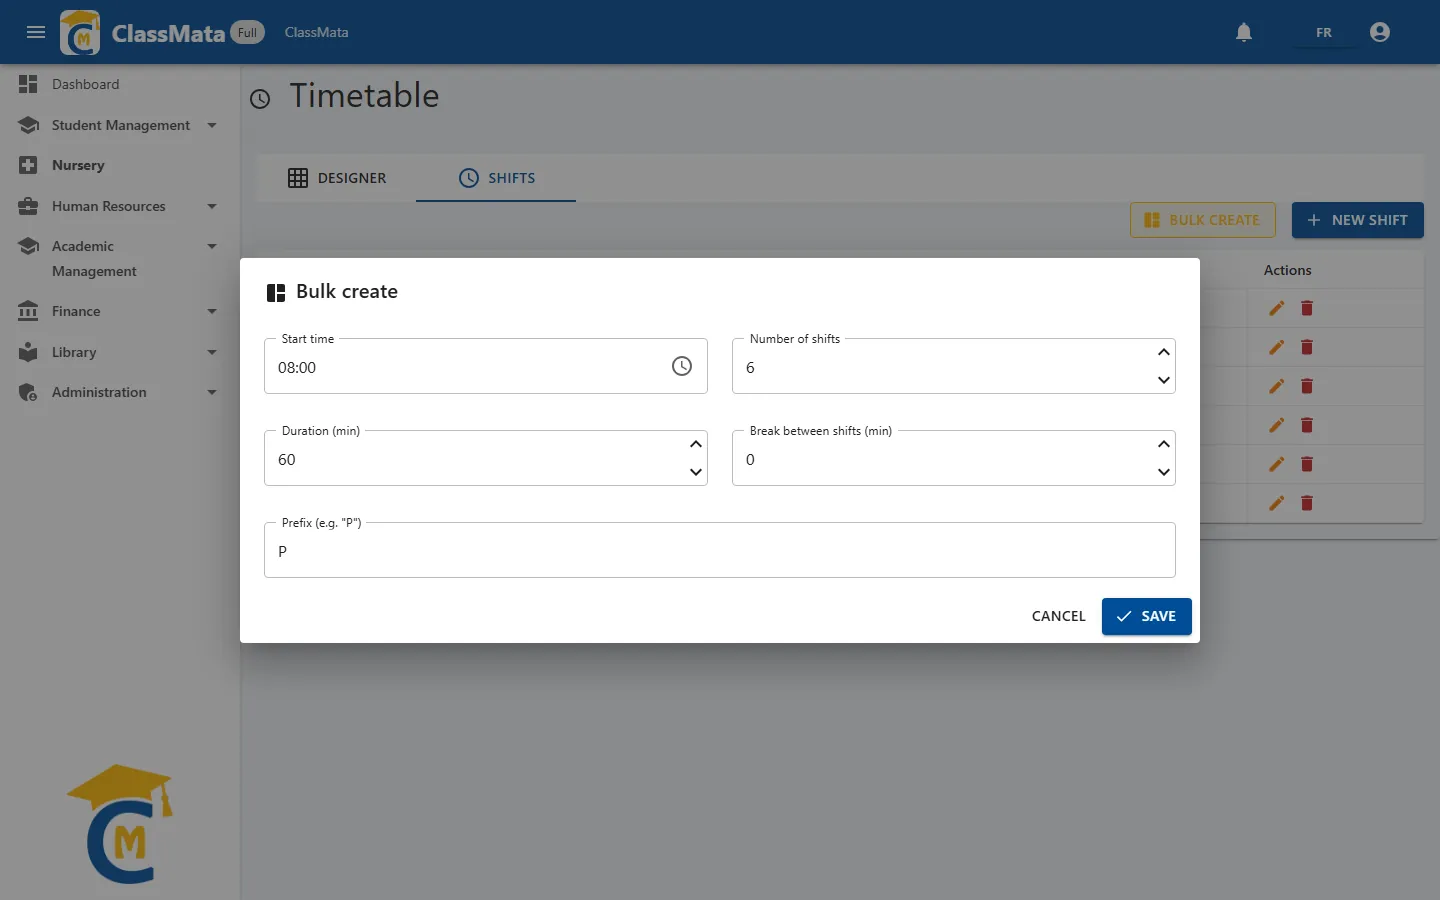
Open Academic Management → Timetable, then the Shifts tab. Shifts are the day's time slots (P1, P2…) and are the same for every class. The fastest way is Bulk create: give the Start time of the first shift, the Number of shifts, the Duration (min), the Break between shifts (min) and a Prefix. For example, 6 shifts of 60 minutes from 08:00 with no break give P1 08:00-09:00 up to P6 13:00-14:00.
Step 3: Assign subjects and teachers to the class
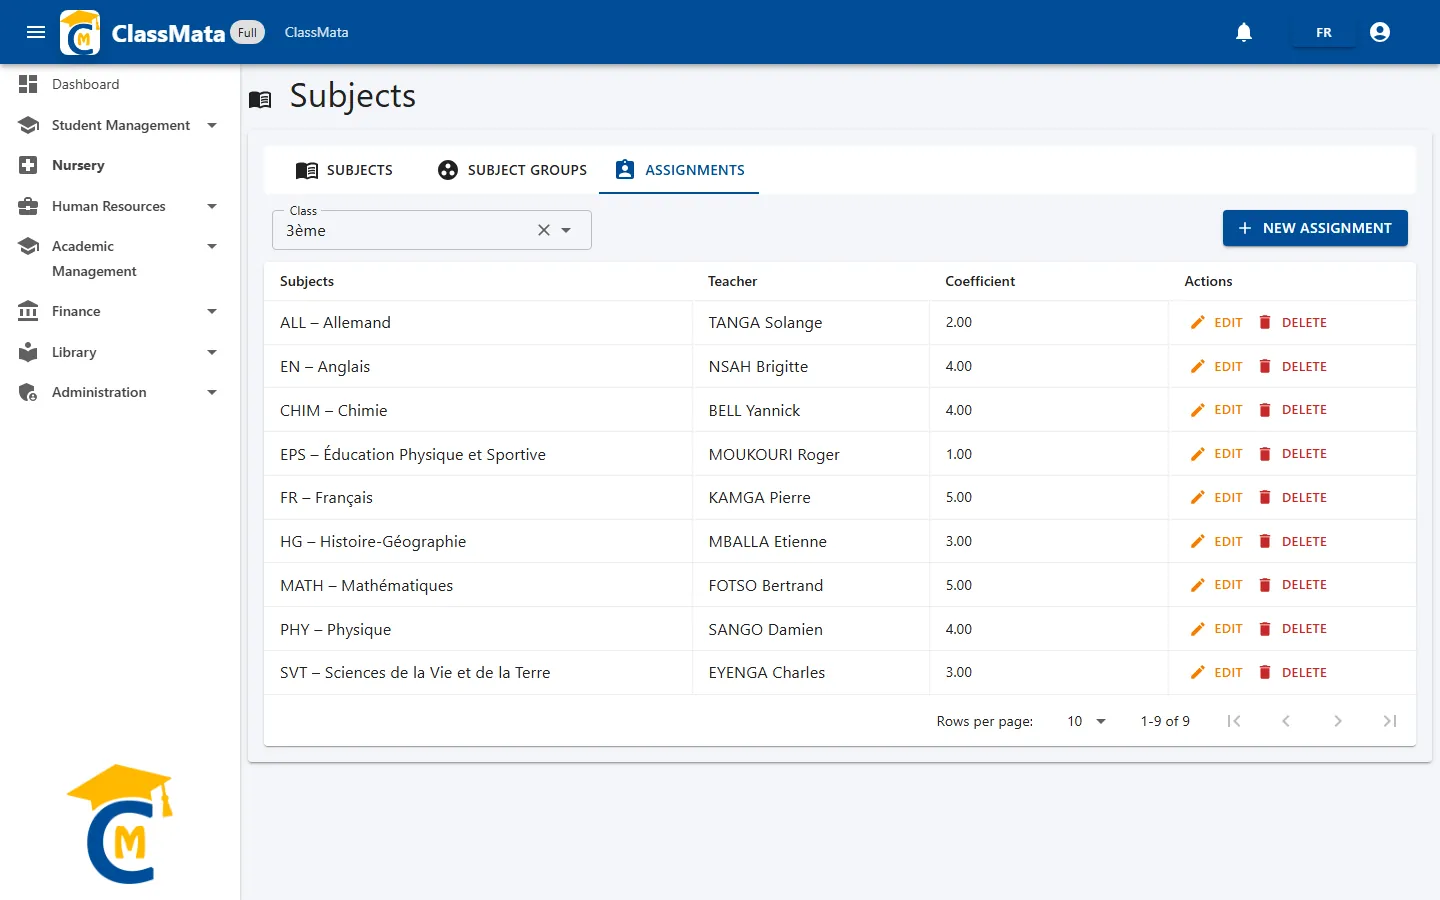
Open Academic Management → Subjects, then the Assignments tab, and choose the class. Only subjects assigned to a class can be placed in its timetable; without assignments the designer shows "No subjects are assigned to this class. Create the assignments first." For each assignment, pick the Teacher so that the lesson shows who teaches it. Details: Subjects.
Step 4: Open the class's grid
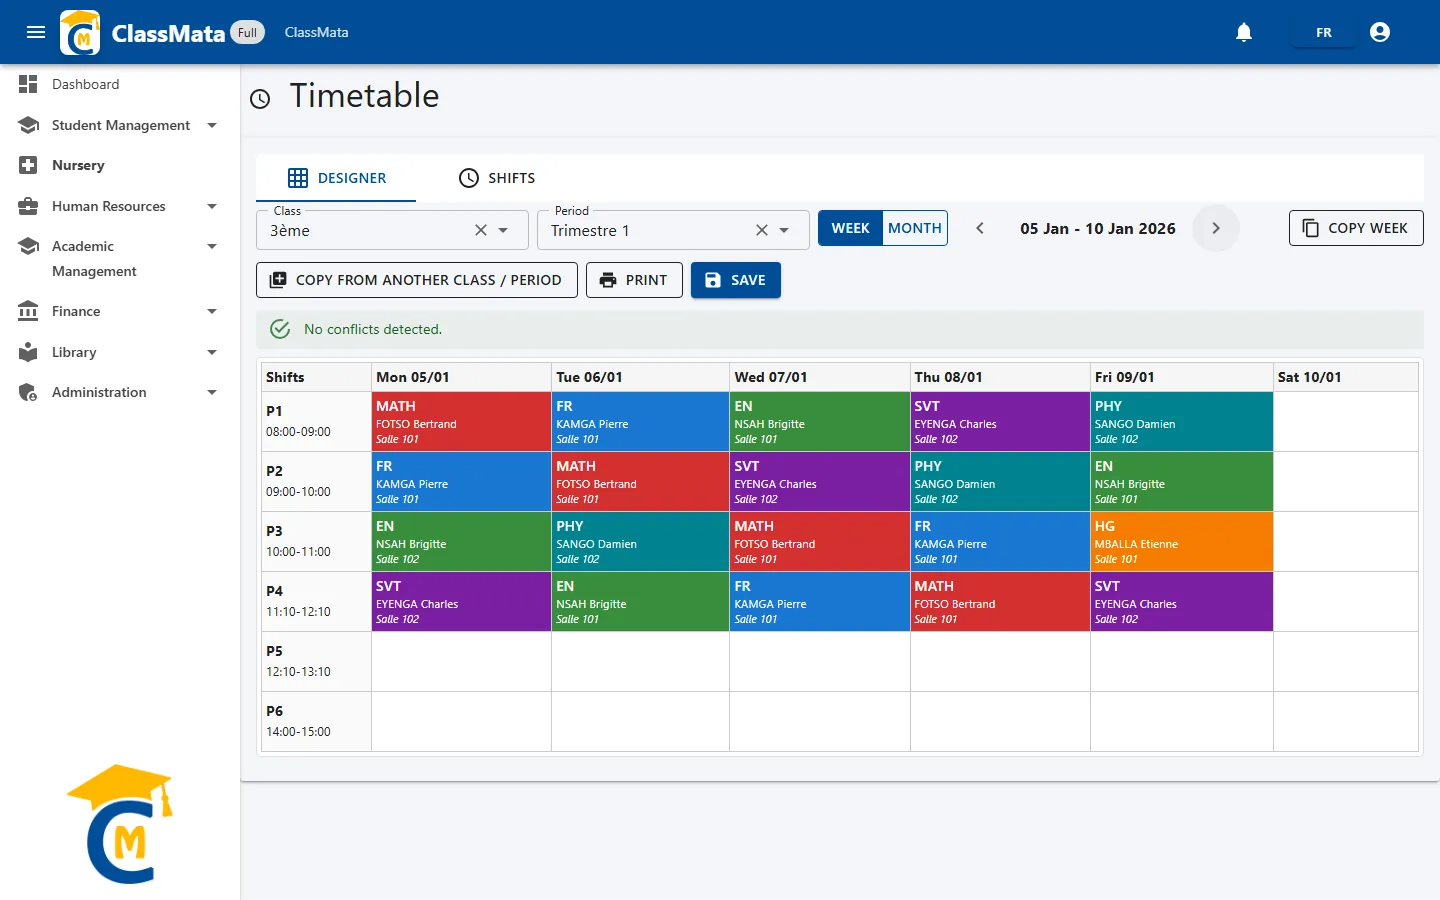
Back in Timetable → Designer, choose the Class and the Period. The week grid appears: one row per shift, one column per day, Monday to Saturday. Use the ‹ and › arrows to change week.
Step 5: Place the lessons
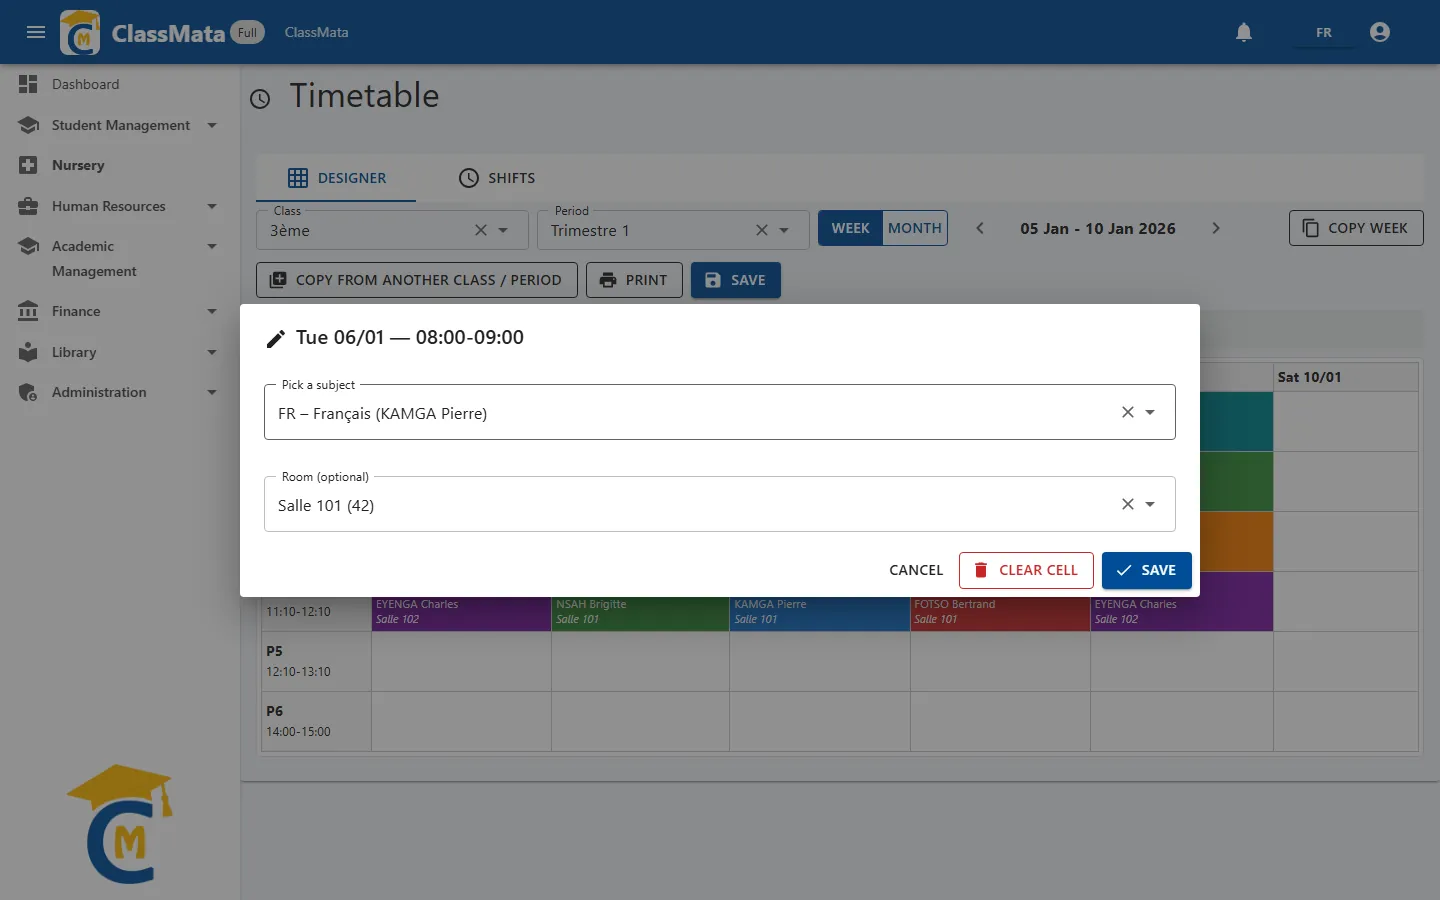
Click a cell. In the window, choose a subject (the list shows the class's subjects with their teacher) and, optionally, a Room, then click Save to apply it to the cell. Clear cell empties it. The cell now shows the subject code, the teacher and the room, in the subject's colour.
Step 6: Read the conflict banner
After each change, ClassMata checks the planning. A green No conflicts detected. banner means nobody is in two places at once. An orange banner lists two kinds of problem, with a Details button and a red frame on the cells concerned:
| Conflict | Meaning |
|---|---|
| Teacher conflict | The same teacher is on two lessons at the same time |
| Room conflict | The same room is used by two lessons at the same time |
Move or change one of the two lessons until the banner turns green. Saving is possible with conflicts, but fixing them first avoids a timetable that cannot be followed.
Step 7: Save with the toolbar button
Nothing is stored until you click the toolbar's Save button. An "Unsaved changes" badge above the grid reminds you of pending edits.
Step 8: Reuse what you built
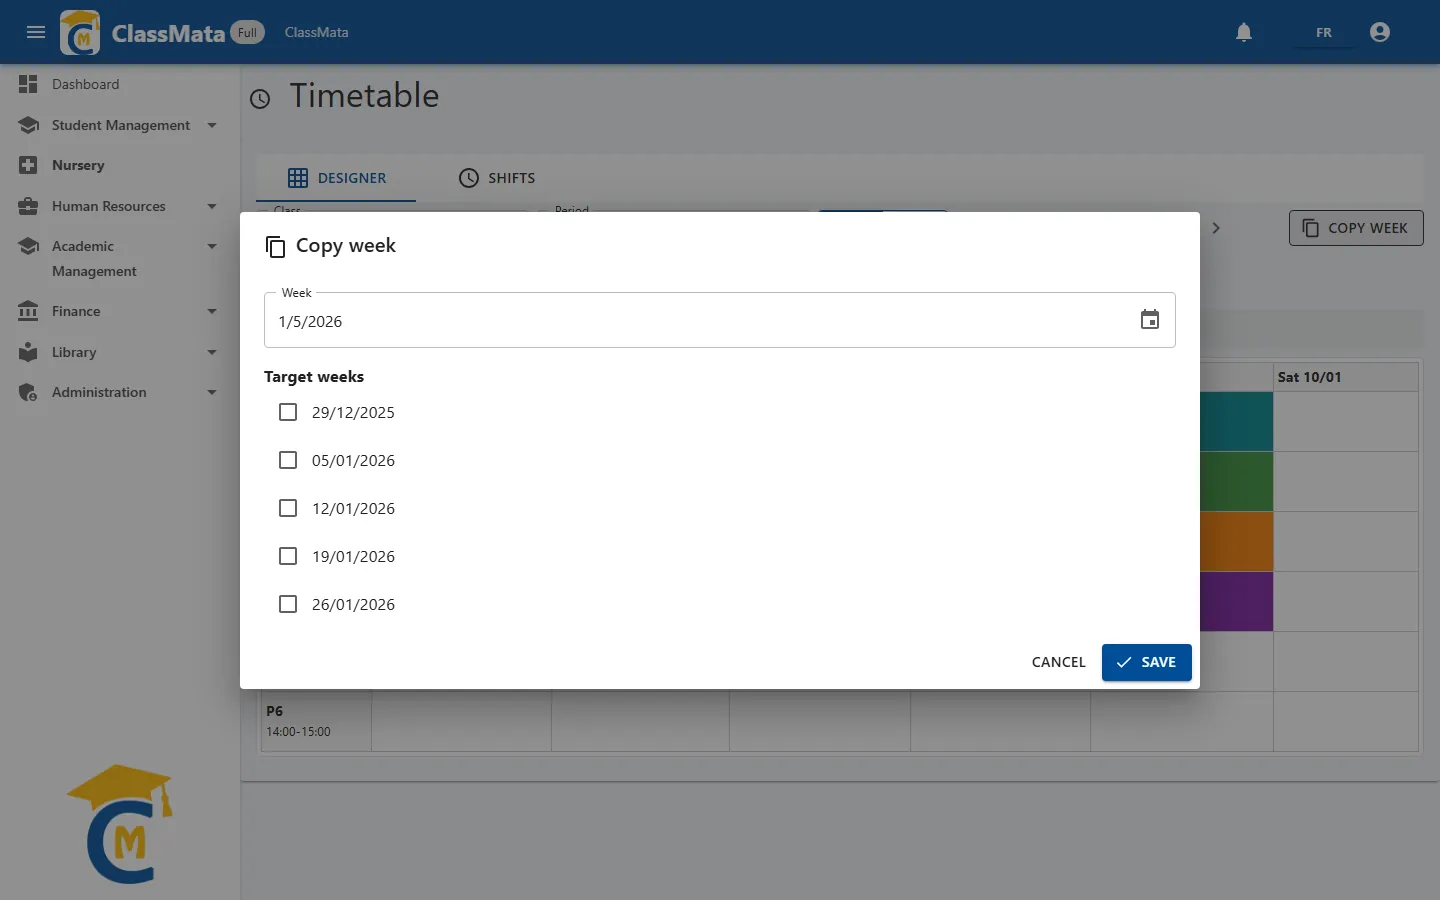
- Copy week reproduces a finished week onto other weeks of the period: pick the source week, tick the Target weeks, confirm.
- Copy from another class / period imports a whole timetable from another class or period, which is useful from one term to the next or between classes of the same level.
Step 9: Print
The Print menu offers Class – Week, Class – Month, Teacher – Week and Teacher – Month. Print the class editions for the notice board and the teacher editions for staff.
Quick troubleshooting
| You see | Cause | Fix |
|---|---|---|
| "No subjects are assigned to this class…" | No assignment for the class | Step 3 |
| A cell cannot be clicked | The week is outside the period's dates | Check the period in Step 1 |
| A subject is missing from the cell list | It is not assigned to this class | Step 3 |
| Orange banner | Teacher or room used twice | Step 6 |
What next?
Once the timetable is saved, it feeds two other pages: Staff Attendance only lists the lessons actually scheduled for each teacher, and Lesson Coverage computes the hours scheduled from it. Follow the guide Track curriculum coverage and teacher attendance to use them. Reference page: Timetable.
Last updated: